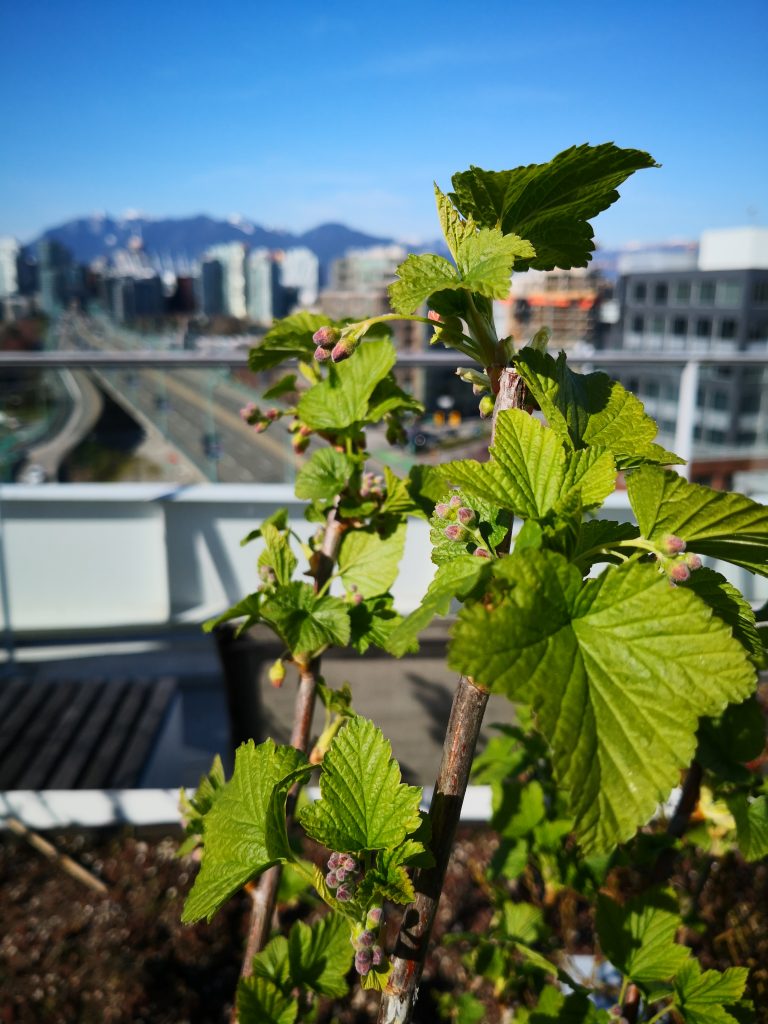
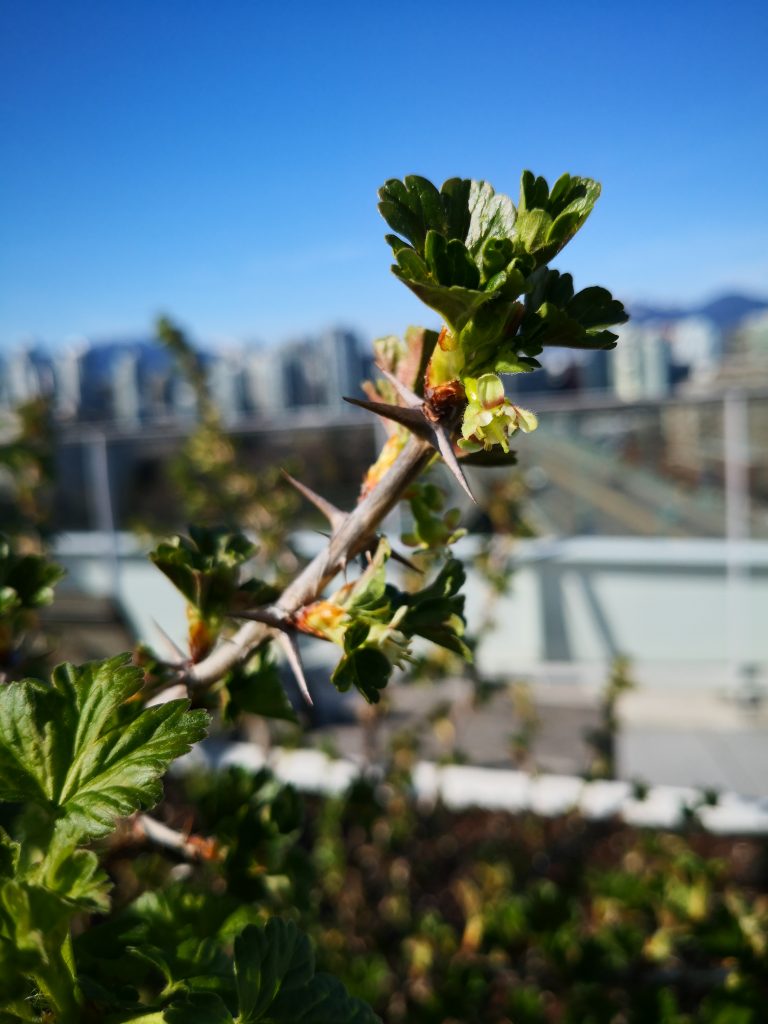
Wildflower seeds were planted last fall in hopes of having blooms in early spring to support mason bee populations on our building rooftop. While plants sprouted shortly after last frost, growth stalled for several weeks and only now are we seeing any actual blooms. This may be part of the reason that bee appearances seem to have dropped off given their only options for the past several weeks have been dandelions, strawberry flowers and currant, blueberry and gooseberry blooms. Not a terrible set I guess, but not enough to compete with streets lined with cherry blossoms at street level.
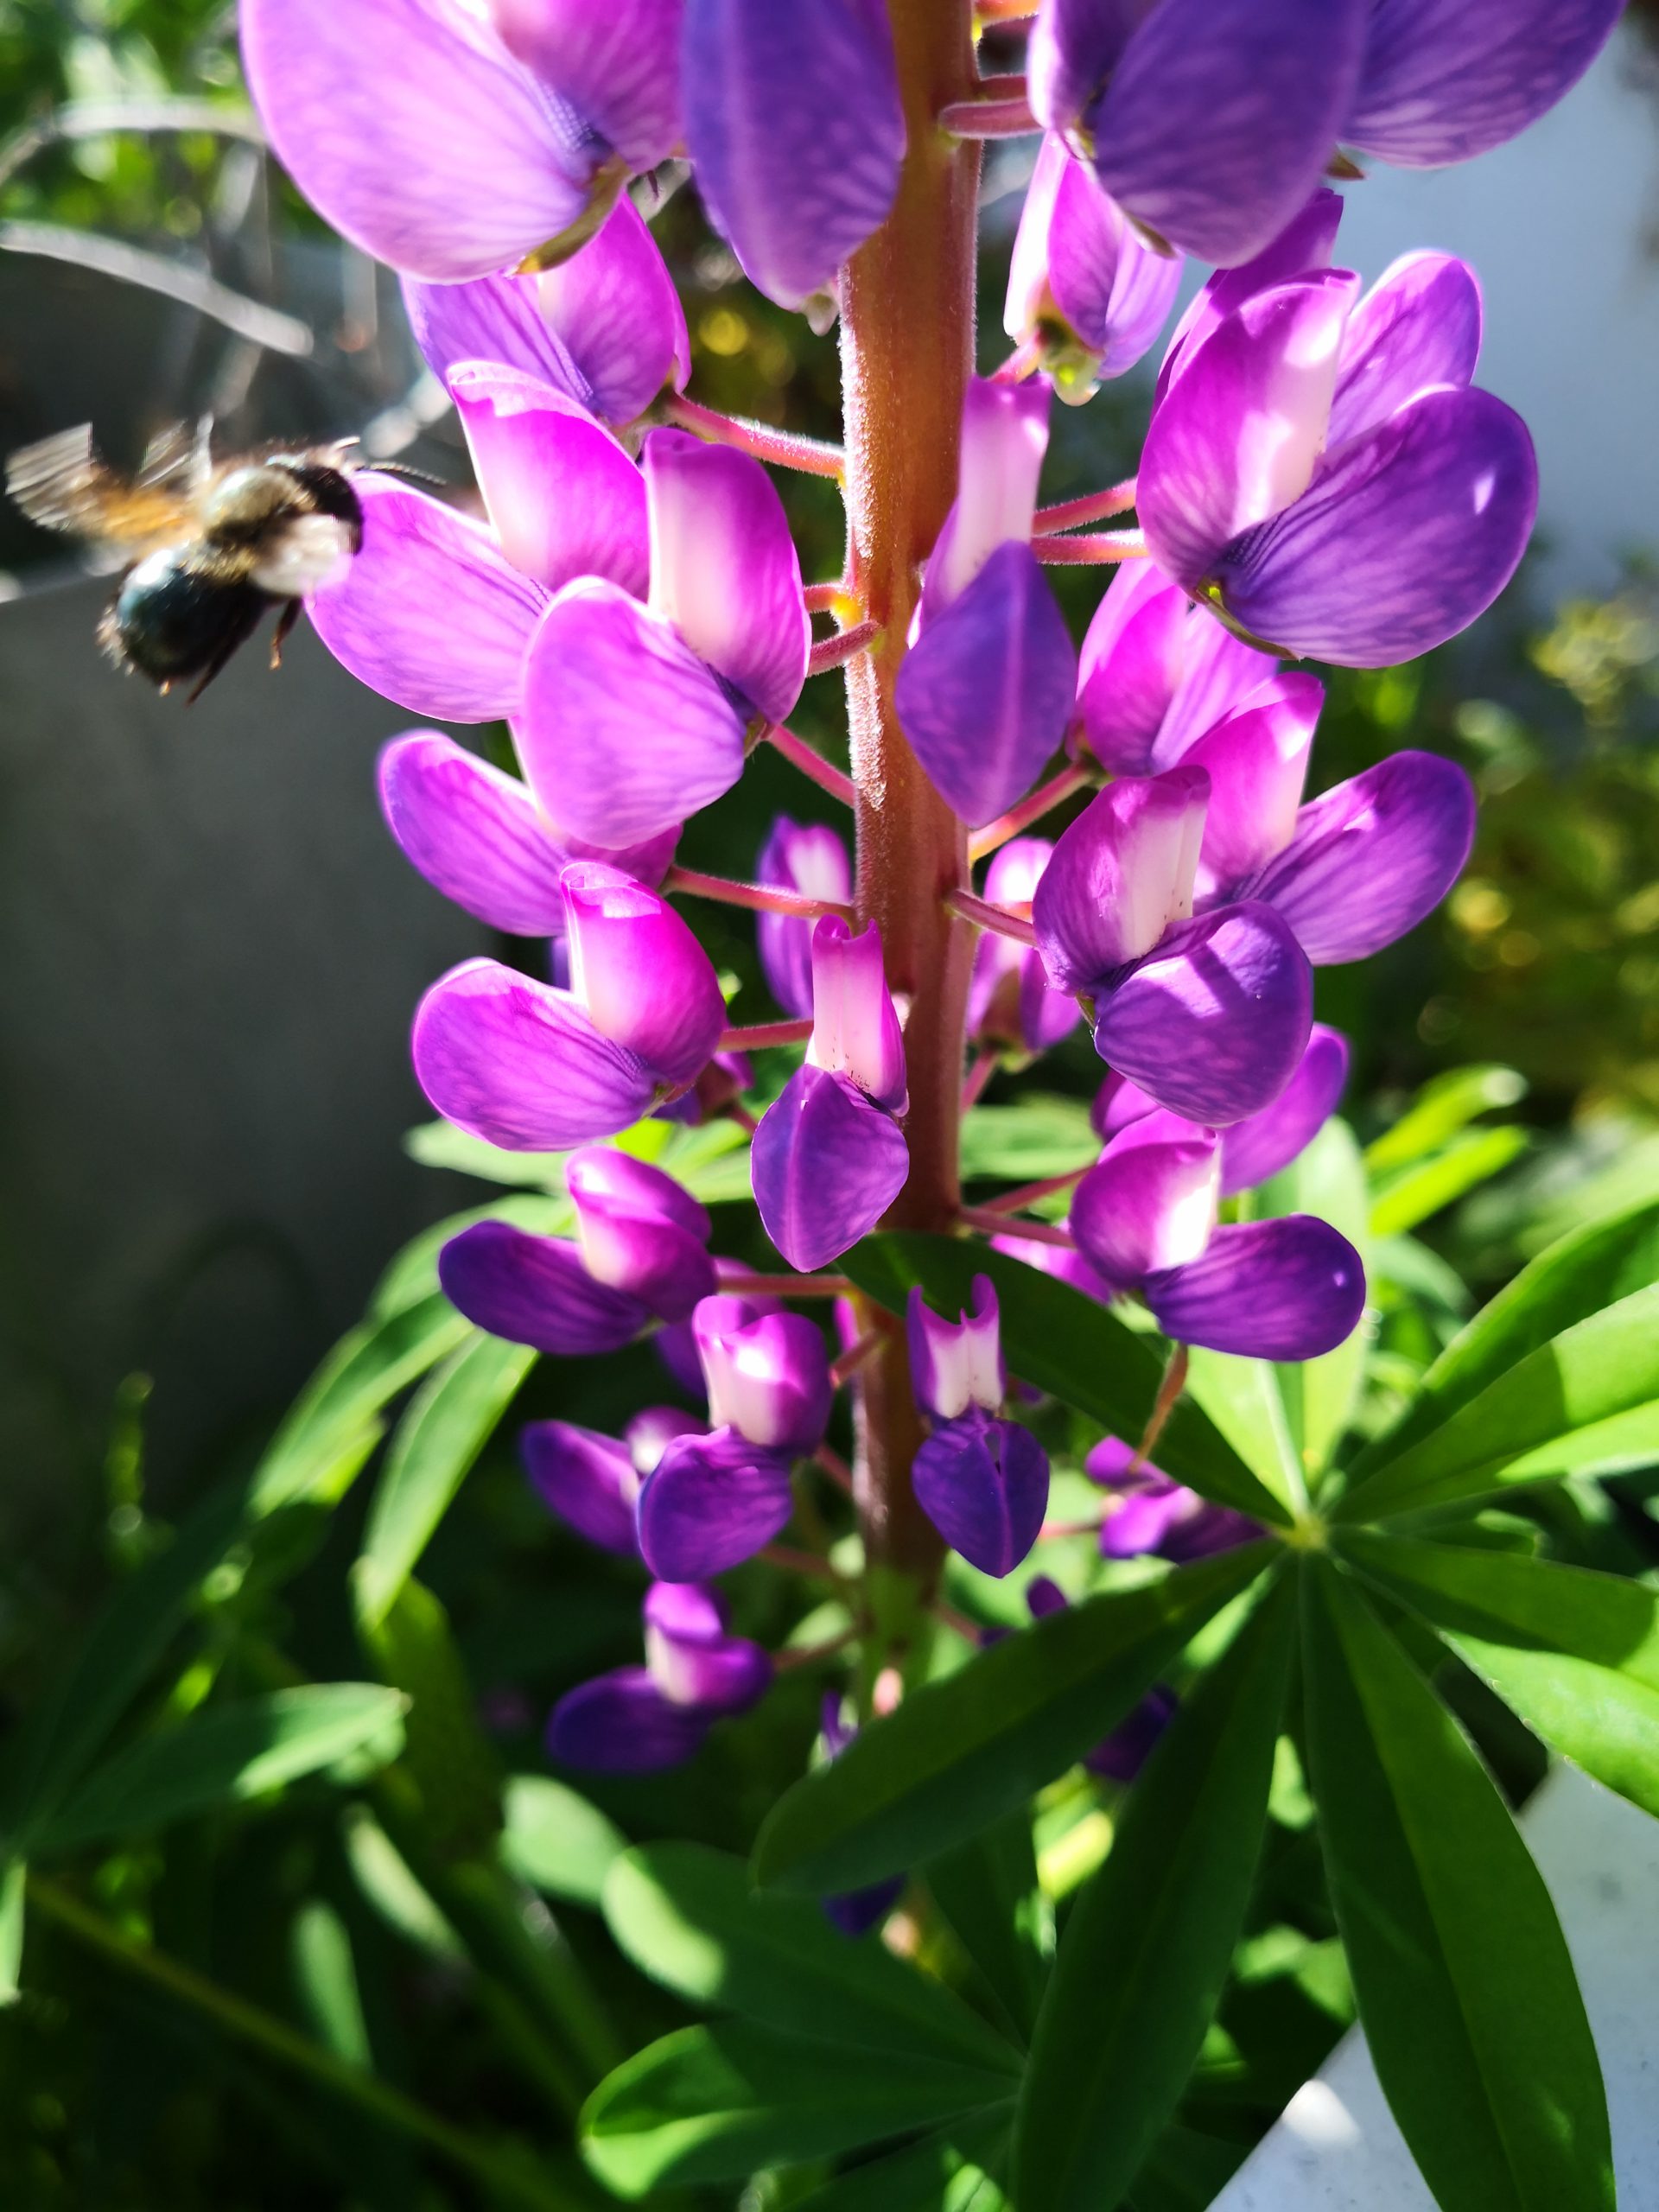
We’re mid-May now and things have started to look up. The first California poppy bloom is out, a few wild roses and an explosion of lupines have added to the flower options at elevation. Additionally what I believe is Euphorbia cotinifolia (Caribbean Copper Plant) is threatening to bloom and despite its tiny flowers seems to attract bees of various types.
Fingers crossed this year won’t be a mason bee bust… but only time will tell.
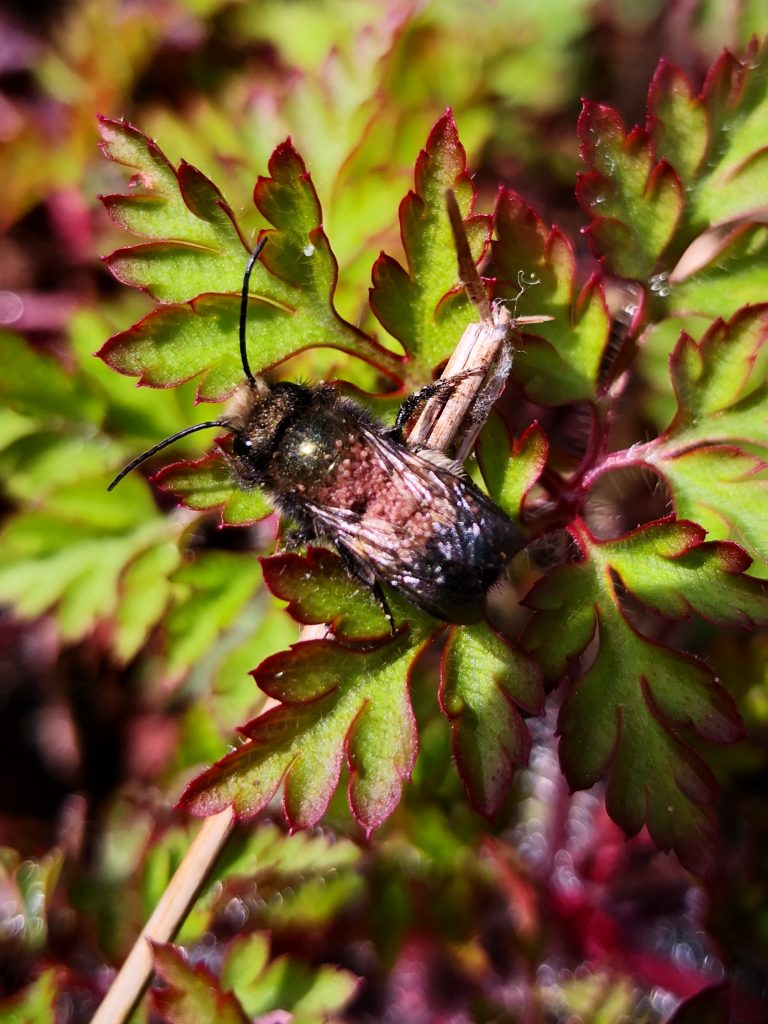
Mason bee about to land on a purple lupine.
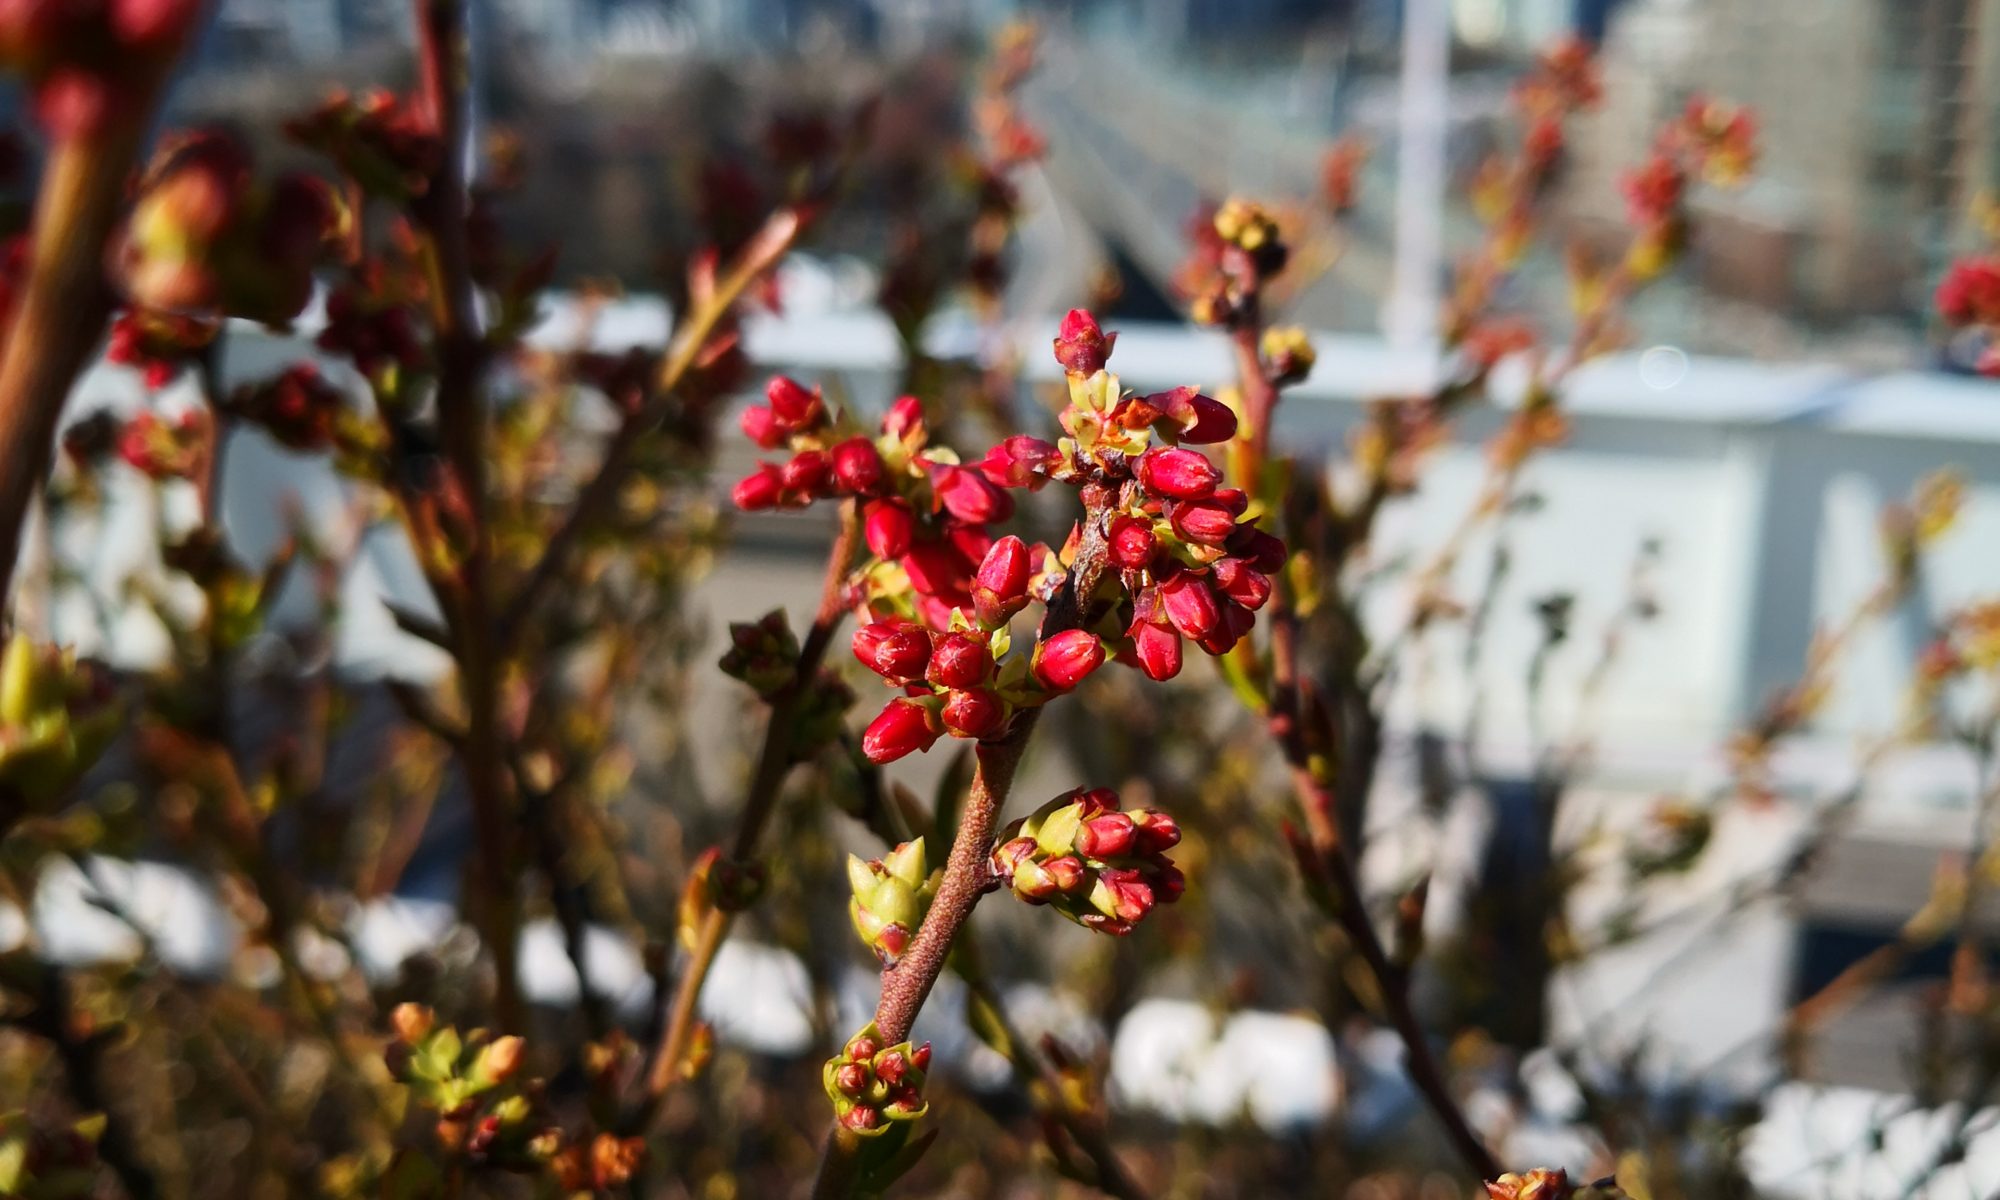
Brief flowering of pink wild roses about to start on the roof of a Vancouver condo.
The weather forecast is suggesting highs in the mid 20s and lows around 10 degrees over the next week. After highs in the low teens and single digit lows this comes as welcome news, especially given the size of the seedlings that are still indoors.
Beginning yesterday we’ve been starting to harden off our pepper, tomato, squash and cucumber seedlings in anticipation of planting. In full transparency we’ve had issues with hardening off vegetables every year so far, but remain hopeful that each experience has provided learnings to limit risk going forward. Seedling hardening issues encountered include:
Unexpected high winds. Our growing space is on the roof of a multi-story building. While there are raised borders around the rooftop, they are only typical railing height and provide a windbreak for a few feet from the edge. In year one we positioned plants on a quiet morning, and winds picked up quickly, damaging the young plants before we realized the weather had turned.
Fix: Choose wind-protected areas on the roof, especially early on when transitioning seedlings. Over the days, slowly expose the young plants to increasing amounts of wind up to the levels expected through the summer.
Significant sun sensitivity. I read about the importance of not leaving young seedlings out in direct sun at the height of the day, but I didn’t appreciate just how sensitive some plants could be. This isn’t about leaving them in direct sunlight all day… it could be about leaving them in filtered sunlight all day, or direct sunlight for a full hour on day 1. These guys are sensitive.
Fix: In the first few days, be cautious about filtered light. Day 1 we’re using full shade for plants, moving to filtered light and only later to direct sunlight. Similarly, starting with very brief periods of exposure. It’s surprising how little exposure is required on day 1 before your seedlings start to show signs of stress.
Pests. First year we moved plants from the outdoors back into the room where they originally germinated. This didn’t affect the seedlings themselves, but transported pests into our home. Shortly after we started, we round ourselves with an aphid issue with our houseplants.
Fix: When not outside, plants being hardened are held in our building stairwell. Fortunately the stairwells in this building have sizeable east and west facing windows, so the plants aren’t in darkness.
That’s it. Take this info not as guidance, but as a one person’s experience and modify as appropriate for your situation. Good luck!
In my earlier post I noted that I was planning to try out grow bags for my peppers this year. The reasons for testing this route are as follows:
I would like to bring the healthiest of my peppers indoors to over-winter.
Our soil quality is very poor, and improving it too much over the years may prove problematic as on our roof we need to keep soil weight down. With grow bags I can focus application of manure and compost in a very constrained area and limit the long term addition of weight.
Once it’s clear which plants are strongest I can adjust placement to maximize light, heat etc to those that will best deliver against those inputs.
When I wrote the earlier post I was looking at Vivosun grow bags (Canadian grow bag link here), and specifically the 5 gallon size. After some additional reading I’ve changed direction, at least for my first purchase. Yesterday I received my shipment of 9 Bekith 3 gallon grow bags (Canadian link to the Belkin grow bags here). I chose to go slightly smaller as several sources suggested that 3 gallons would be sufficient for first year peppers, and to limit the expense to fill all the bags with quality potting soil, manure and compost (at least the compost’s free as we have 2 Worm Factory 360 composters on our roof (Canadian link to the Worm Factory 360 composter here).
While I haven’t yet filled the bags (I’ll do so when the peppers are ready to transplant directly into them) I can say that they appear to be of decent quality. I’m hoping to get 3 or 4 years out of them, and given thickness and apparent construction quality I can see that happening. I’ll be curious to see how water permeable they are, and as a result how much more frequently I may have to water them.
I can’t wait for temperatures to get a bit higher and more consistent so I can get this rolling.
Our mason bees have mostly emerged and unfortunately our rooftop is almost devoid of flowers. With the exception of a large rosemary plant, and some heather there is very little to keep the bees around right now. At ground level the cherry blossoms are out, so hopefully that vertical distance isn’t too much to prevent them from returning over the next little while.
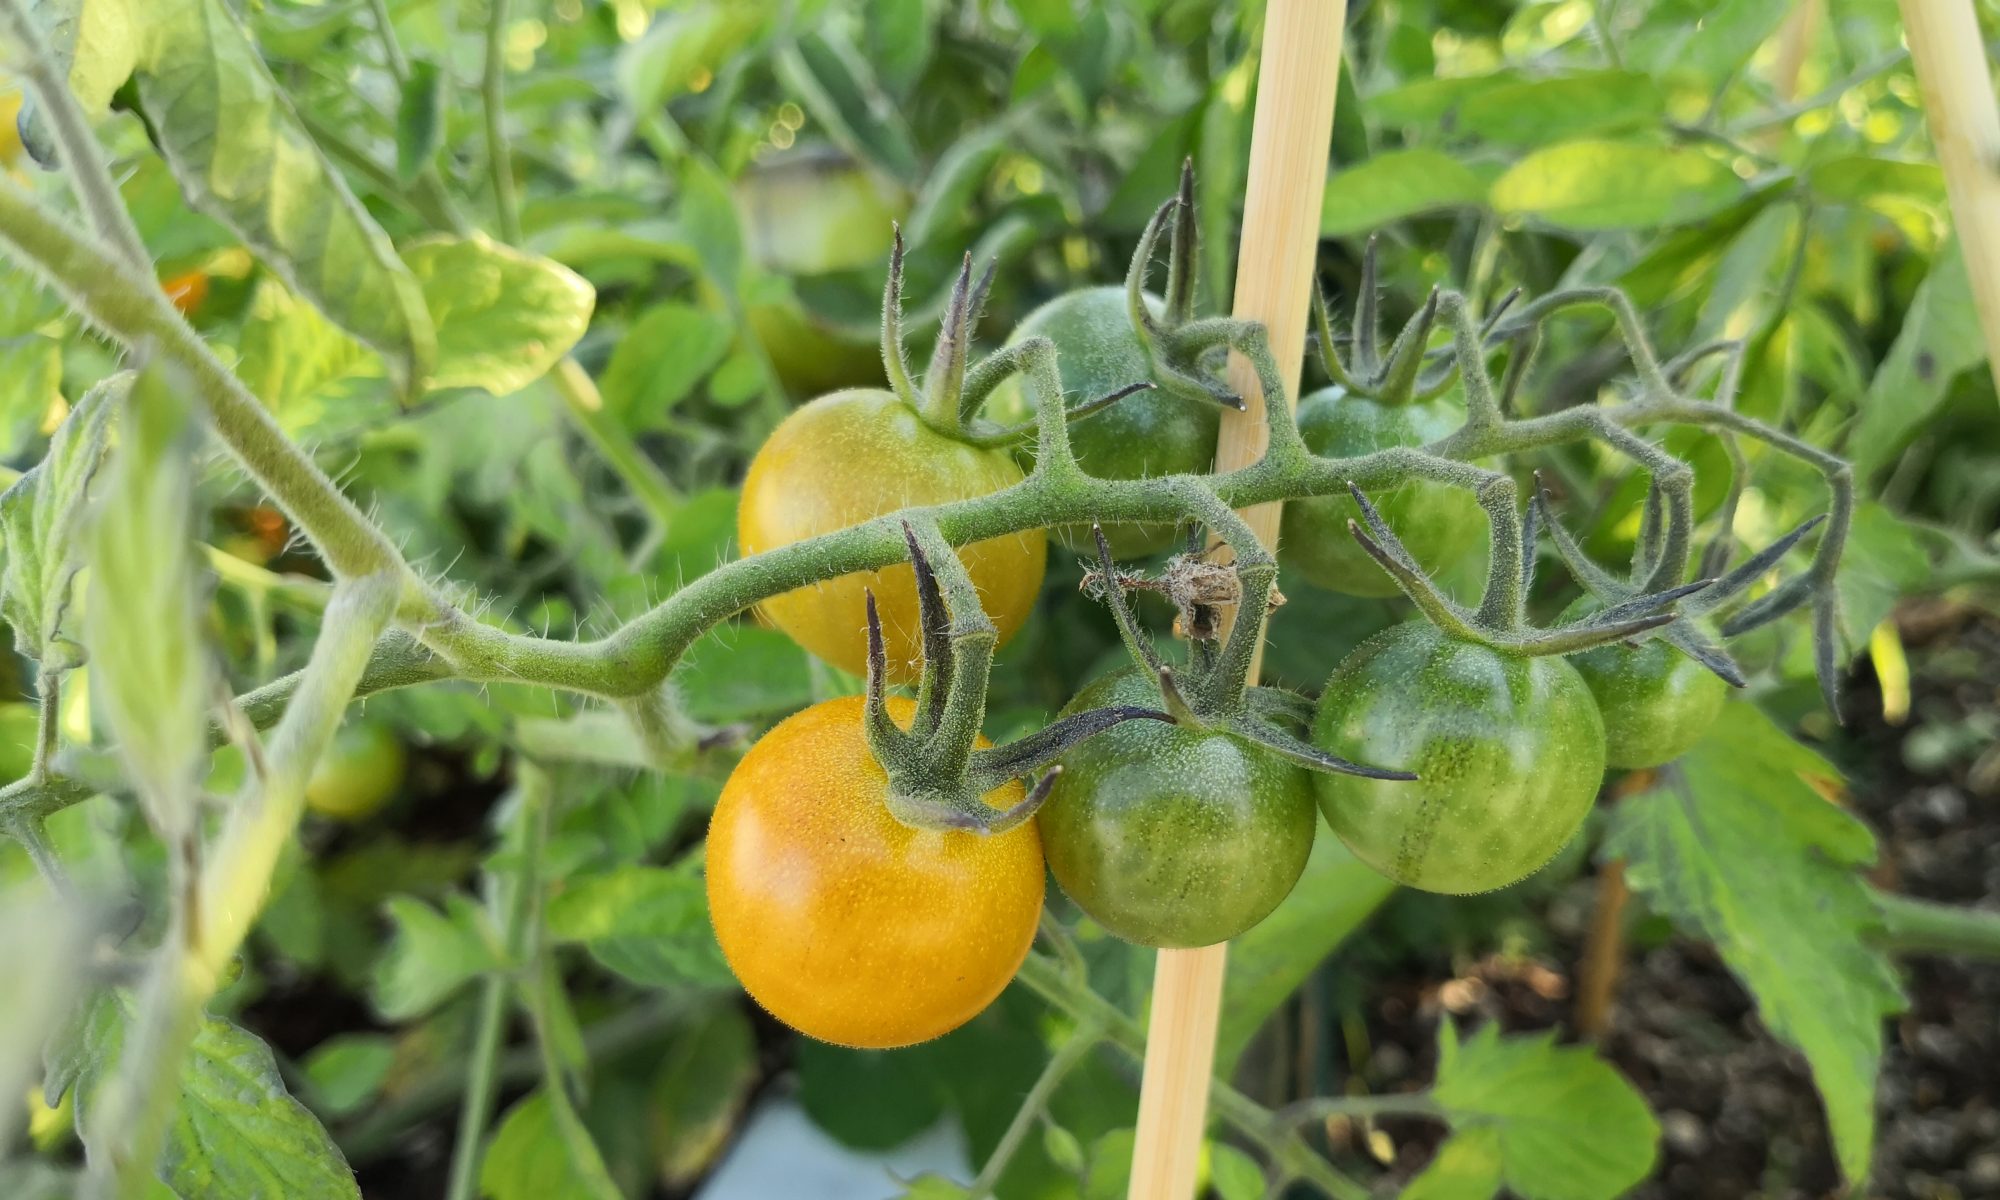
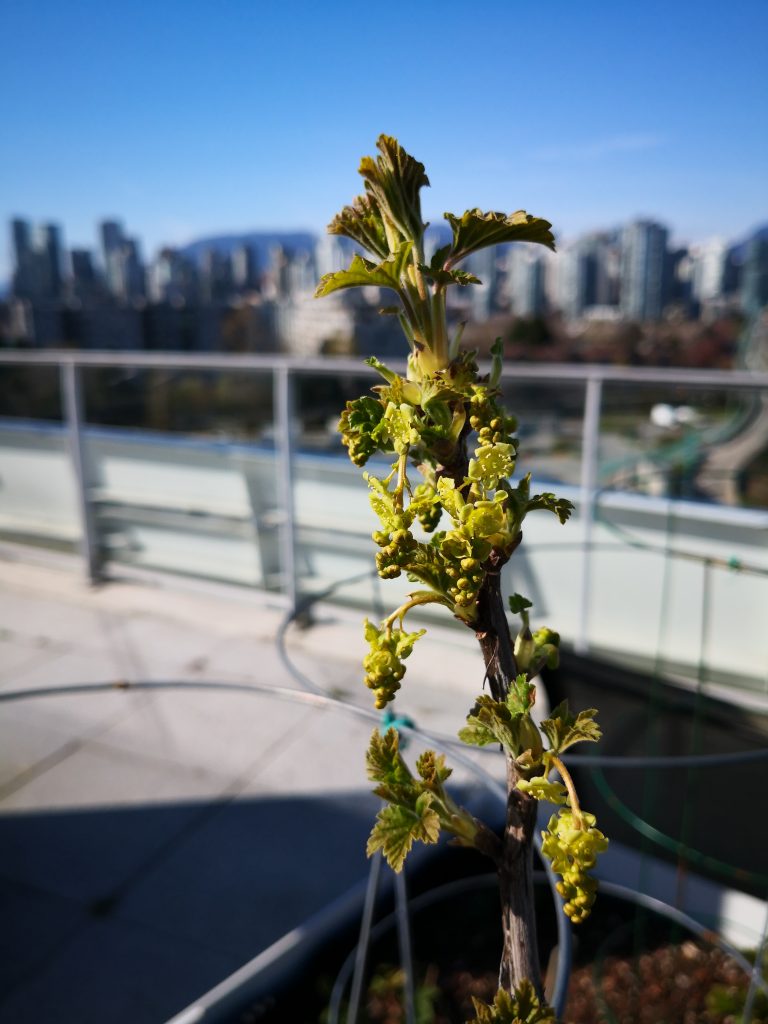
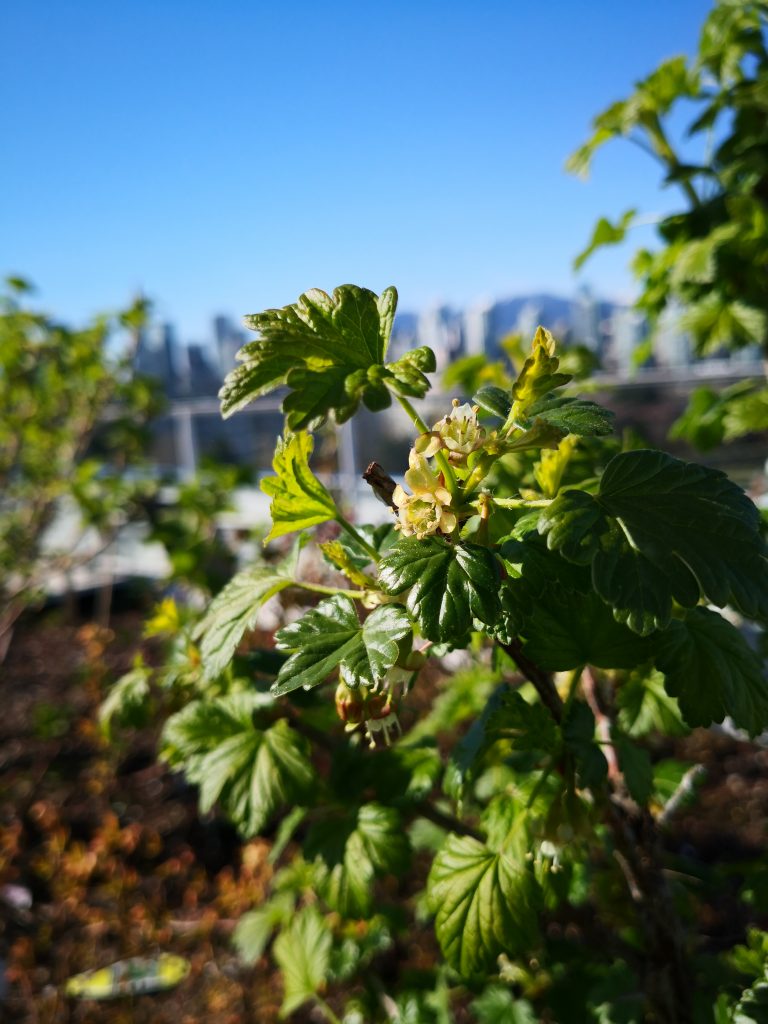
On the upside, our berry bushes are showing leaves and FAR more flower buds than we saw over the past two years. Red currants, black currants, gooseberries and blueberries have started flowering over the past week and while the flowers aren’t the bright pinks and reds of some other plants, it looks like they’ll be available in abundance. If we’re lucky there are still enough mason bees around to pollinate them as we have yet to see any volume of honey bees or bumblebees.
Here’s hoping that the combination of warmer weather and more abundant berry blossoms will do the trick.
As interesting as it is to see mason bees surface after a winter dormant, I was hoping they would wait another week or two as there are virtually no flowers on our roof. Crocus have left us, currants, blueberries and gooseberries all look to be about a week or two away… in fact the only flowing plant on the roof is our massive rosemary. Oh well.
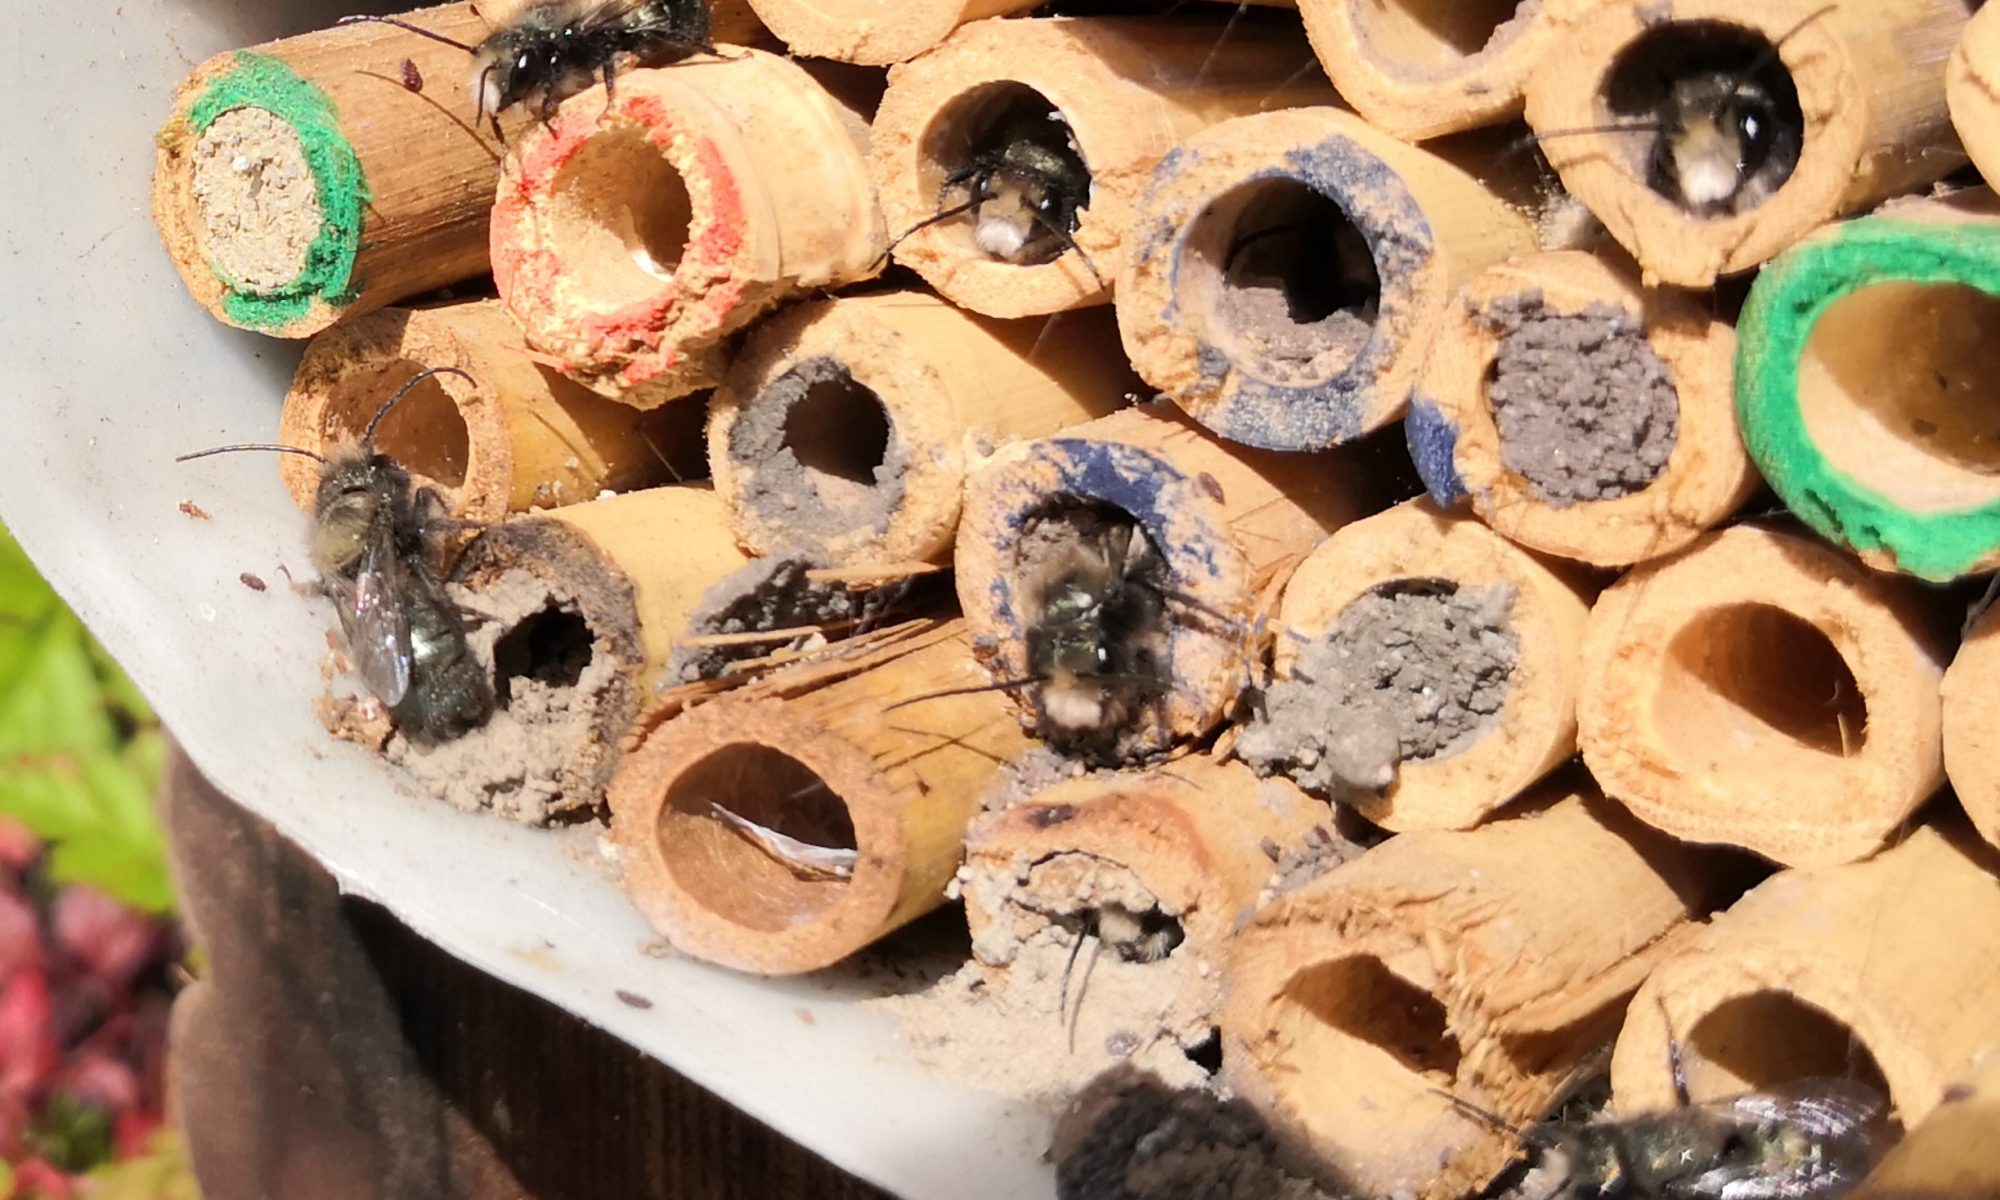
It was purely by chance that I checked the bees this afternoon and noticed a few plugs opened and bees at the entrance. As I’ve mentioned previously, last year we used store-bought bee houses along with bamboo tubes. Since the tubes were nearly impossible to open, I left them in the houses and just moved them to a safe, sheltered place on a north-facing balcony. As a result, the cocoons weren’t cleaned and the temperature control was left largely to nature.
What happened? Well, I was expecting that a lot of the tubes would not emerge at all. As I said, I hadn’t cleaned them, I hadn’t controlled the temperature, they weren’t perfectly shielded from rain through the summer… but I was pleasantly surprised. Emergence happened all at once with mason bee after mason bee peeking out of their tubes and taking short hops before settling on a south-facing surface presumably to warm up.
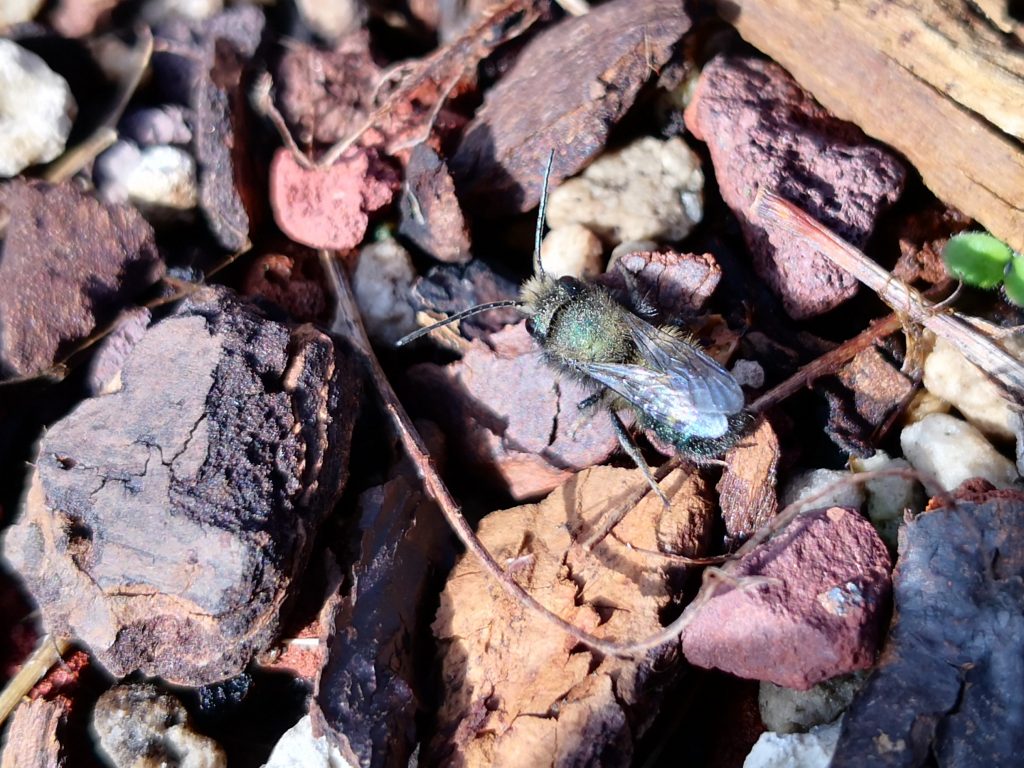
The major issue was something I predicted in an earlier post. While all of the bees looked fat and well-fed, there were some that were absolutely plagued with mites (see the photos in this post). Others, fortunately, seemed to be completely unaffected by mites, but those that were were covered by them.
Mite-infested mason bee minutes after emerging from bamboo tubes. March 2020
Takeaway? This year’s cardboard and paper tube (Canadians can find cardboard tubes here) test is probably warranted given the situation with mites on my mason bees. Toward summer’s end I need to remove and open the mason bee tubes, remove the cocoons and clean them before storing them in the fridge (or other suitable location) until next spring. Hopefully, IF the bees choose to use the paper tubes, and IF the babies survive to form cocoons, and IF I remove and clean them properly we should have a healthy population come next spring.
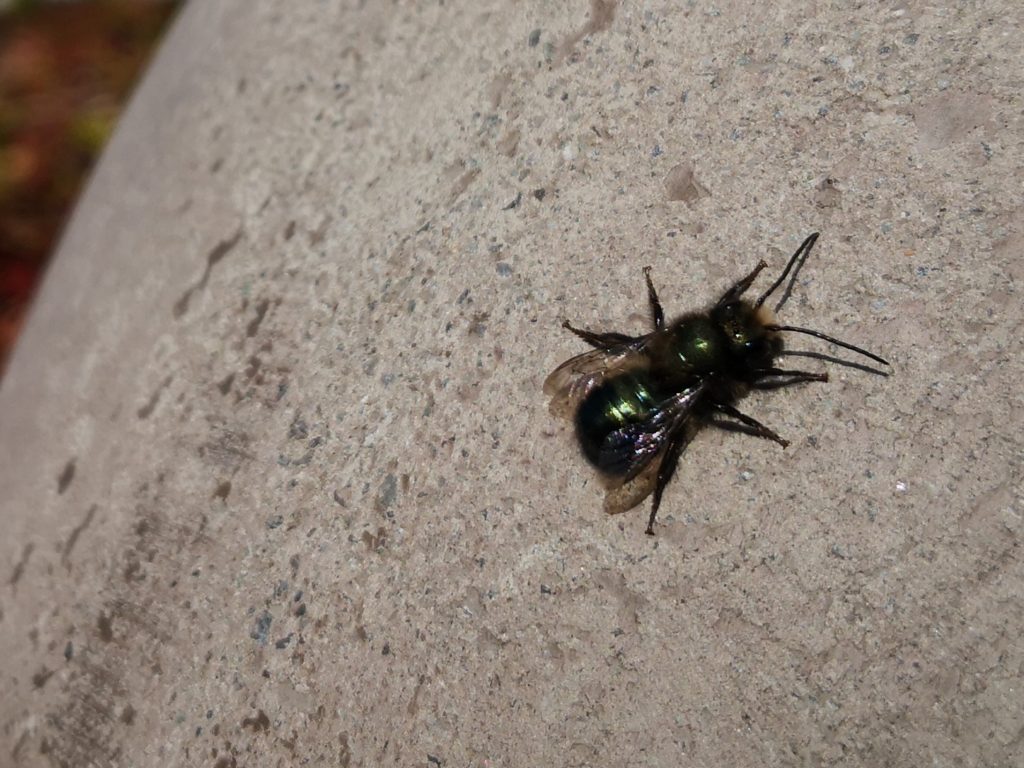
Healthy mason bee minutes after emerging. March 2020
As written in earlier posts the “soil” in our rooftop garden is miserable, made up of sand, lava rock and who-knows-what else presumably to keep it light given the volume up there. I’ve had reasonable success growing in this medium with limited use of compost / worm castings and fertilizer, but my compost bin is limited and the soil volume is substantial.
This year I’m considering fabric grow pots / bags (Amazon Canada has Vivosun grow bags here) for some of the more demanding produce so I can supplement the soil more deliberately through the season, and recover that soil at year’s end rather than have to remember where supplementation occurred for the next year.
From what I’ve read, the 5 gallon fabric grow bags should do for my needs, in particular for use with some of my super hot peppers. I’ll continue to grow most of them in the main planters, but intend to use 3 or for grow bags for comparison this season. I’m assuming the 5 gallon size would suffice for tomatoes as well, and so I’ll likely consider a comparison there as well.
If anyone has any experience using these I’d love to hear about it. I’m particularly curious how well they stand up to weather… can you really expect to get 5 to 7 seasons out of a single bag?
A number of the DIY beer can-based mason bee hives were “installed” this week at various locations on an island in Howe Sound. During a visit last summer, I noticed mason bees coming and going behind cedar shingles on a cabin, and saw them in abundance in a friend’s fruit orchard, so I figured it would be interesting to see if they would take advantage of my low budget mason bee houses.
While this past week has been quite warm between 11am and 2pm, outside those windows it remains uncomfortably cold. As such I saw VERY little bee activity. This may be due in part to the only flowers observed being daffodils, rosemary (introduced) and skunk cabbage (do bees even like skunk cabbage?).
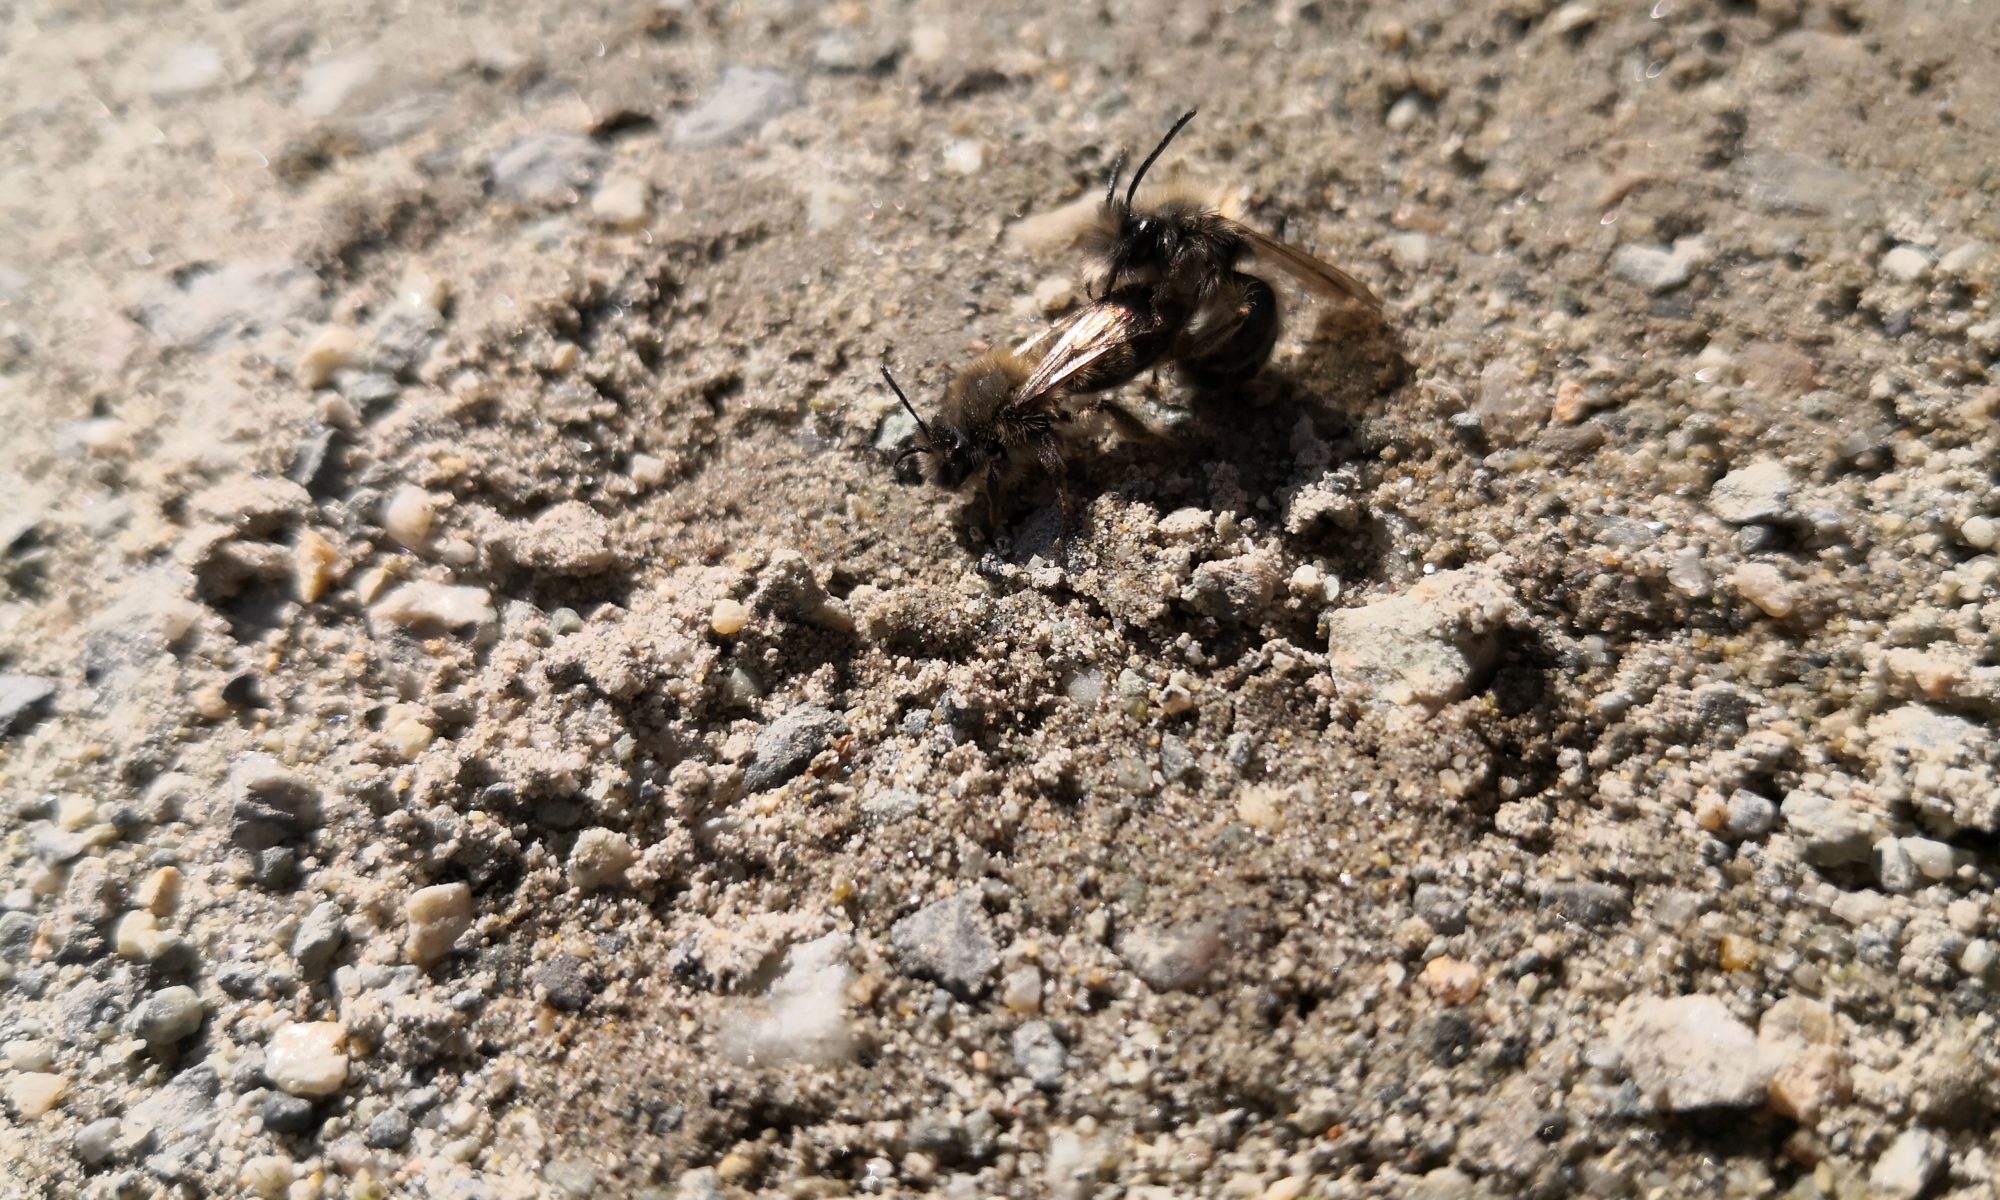
In terms of pollinators, we observed various types of bee flies, bumblebees, honeybees, a single wasp and a pair of mason bees mating in the middle of the road. That single pair suggests the masses are just around the corner, so hopefully the needed flowers hurry up and bloom. Presently there are barely buds on many of the needed trees.
The mason bee(r) houses were placed in several locations across 2 properties on the island. One on the water, and one inland. In both cases the bee houses face south / east and are angled slightly downward to reduce the likelihood of water ingress and pooling. Hopefully our next visit will find hundreds of tubes capped with mud and ready for eventual cleaning.
If these homebrew mason bee houses aren’t your thing, you can of course purchase ready-made mason bee houses on Amazon and elsewhere. For those of you in the US, you can find many mason bee house models here, and if you’re in Canada, then these are the bee houses you’re looking for.
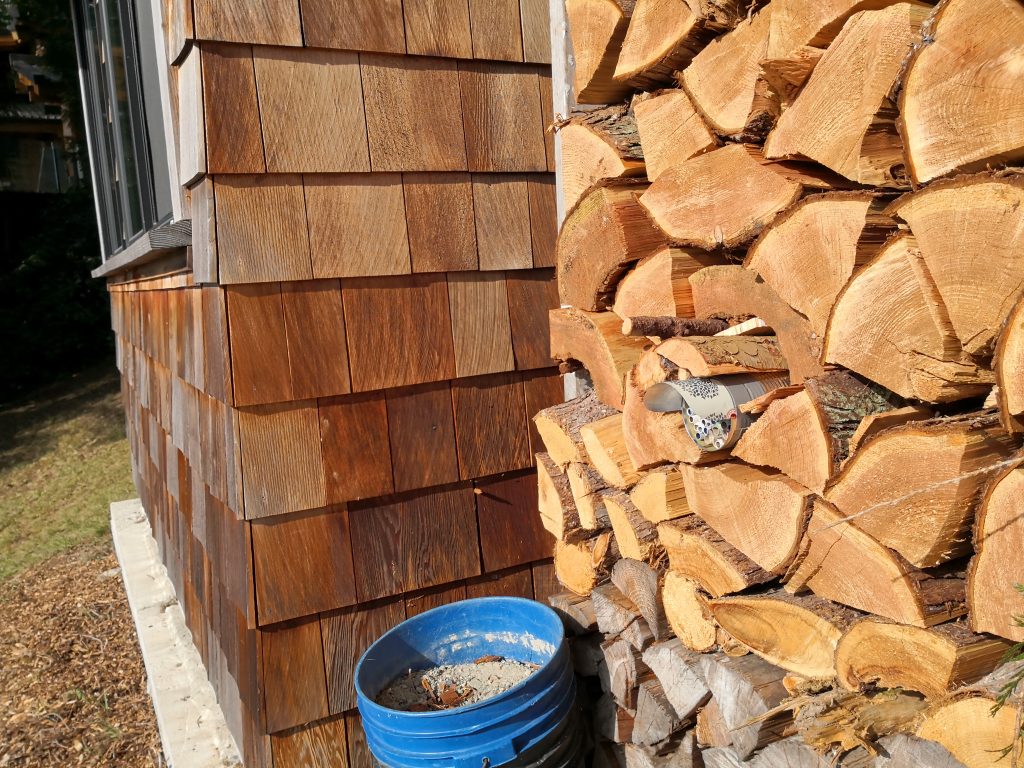
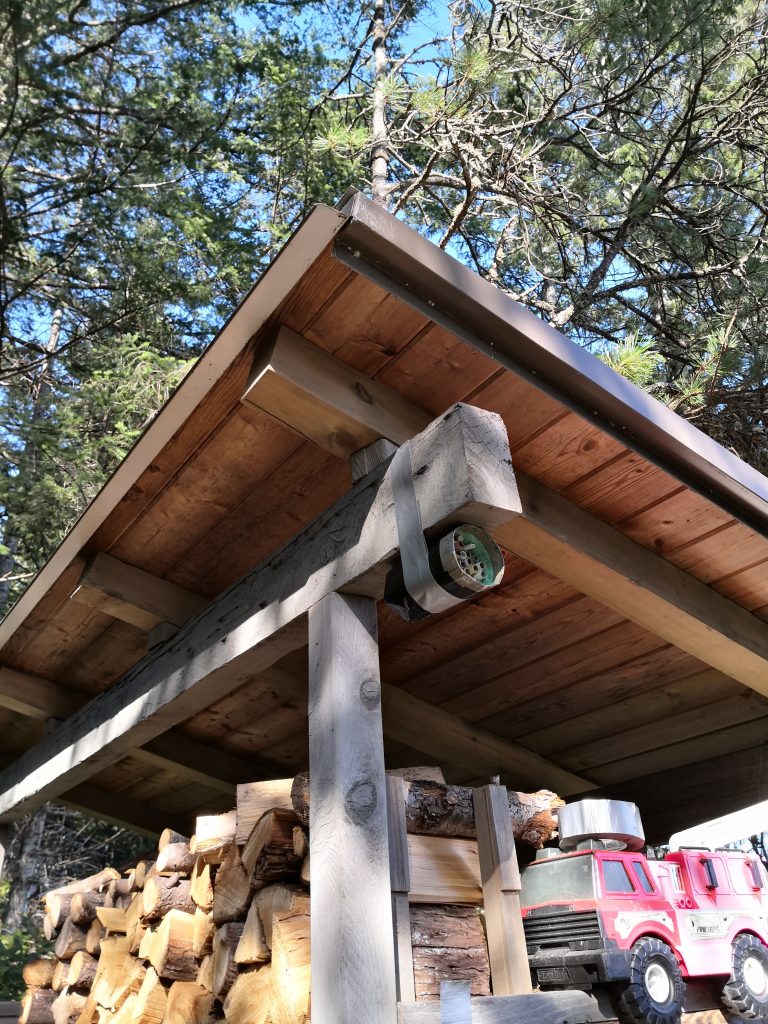
Beer can mason bee house placed in a wood pile.
Pringles can mason bee house mounted on a woodshed.
So I’ve been away since the 15th and left my seedlings to fend for themselves under a full spectrum lamp, and a plastic cover. I have to admit, I was assuming I’d come home to dead peppers… but I’m pleasantly surprised. The pepper seedlings are a bit leggy, so I’ll have to work on correcting that, but they look pretty good given my shameless neglect. Here’s where we sit:
Perhaps not top of mind for most, but I’m wondering how things will play out for the local gardener.
Growing your own should be appealing in this time of social distancing, but with our relatively short growing season, starting from seed isn’t always the most reliable option. While I typically try seeds, I often find myself falling back to garden center purchased plant starts when hardening off fails, or crows take their toll.
Whether or not garden centres are open, their suppliers must surely be continuing to care for their various plants… So this weekend will be about locating sources of plants starts, and contacting them for timing and purchase process. If anything, this may provide a broader selection to choose from, and help keep us out of the stores (eventually) in order to add fresh food to our basics.
This one is a bit of a do it yourself mason bee house experiment. I’m going 100% DIY this year after seeing my store-bought houses disintegrate over the winter while last year’s milk carton-based creations look as good as new (and will only require a quick wipe-down with dilute bleach solution before I reuse them this year). Last week I posted a few examples of the house styles I was playing around with, and since then I’m up to 20 individual bee homes of various shapes and sizes.
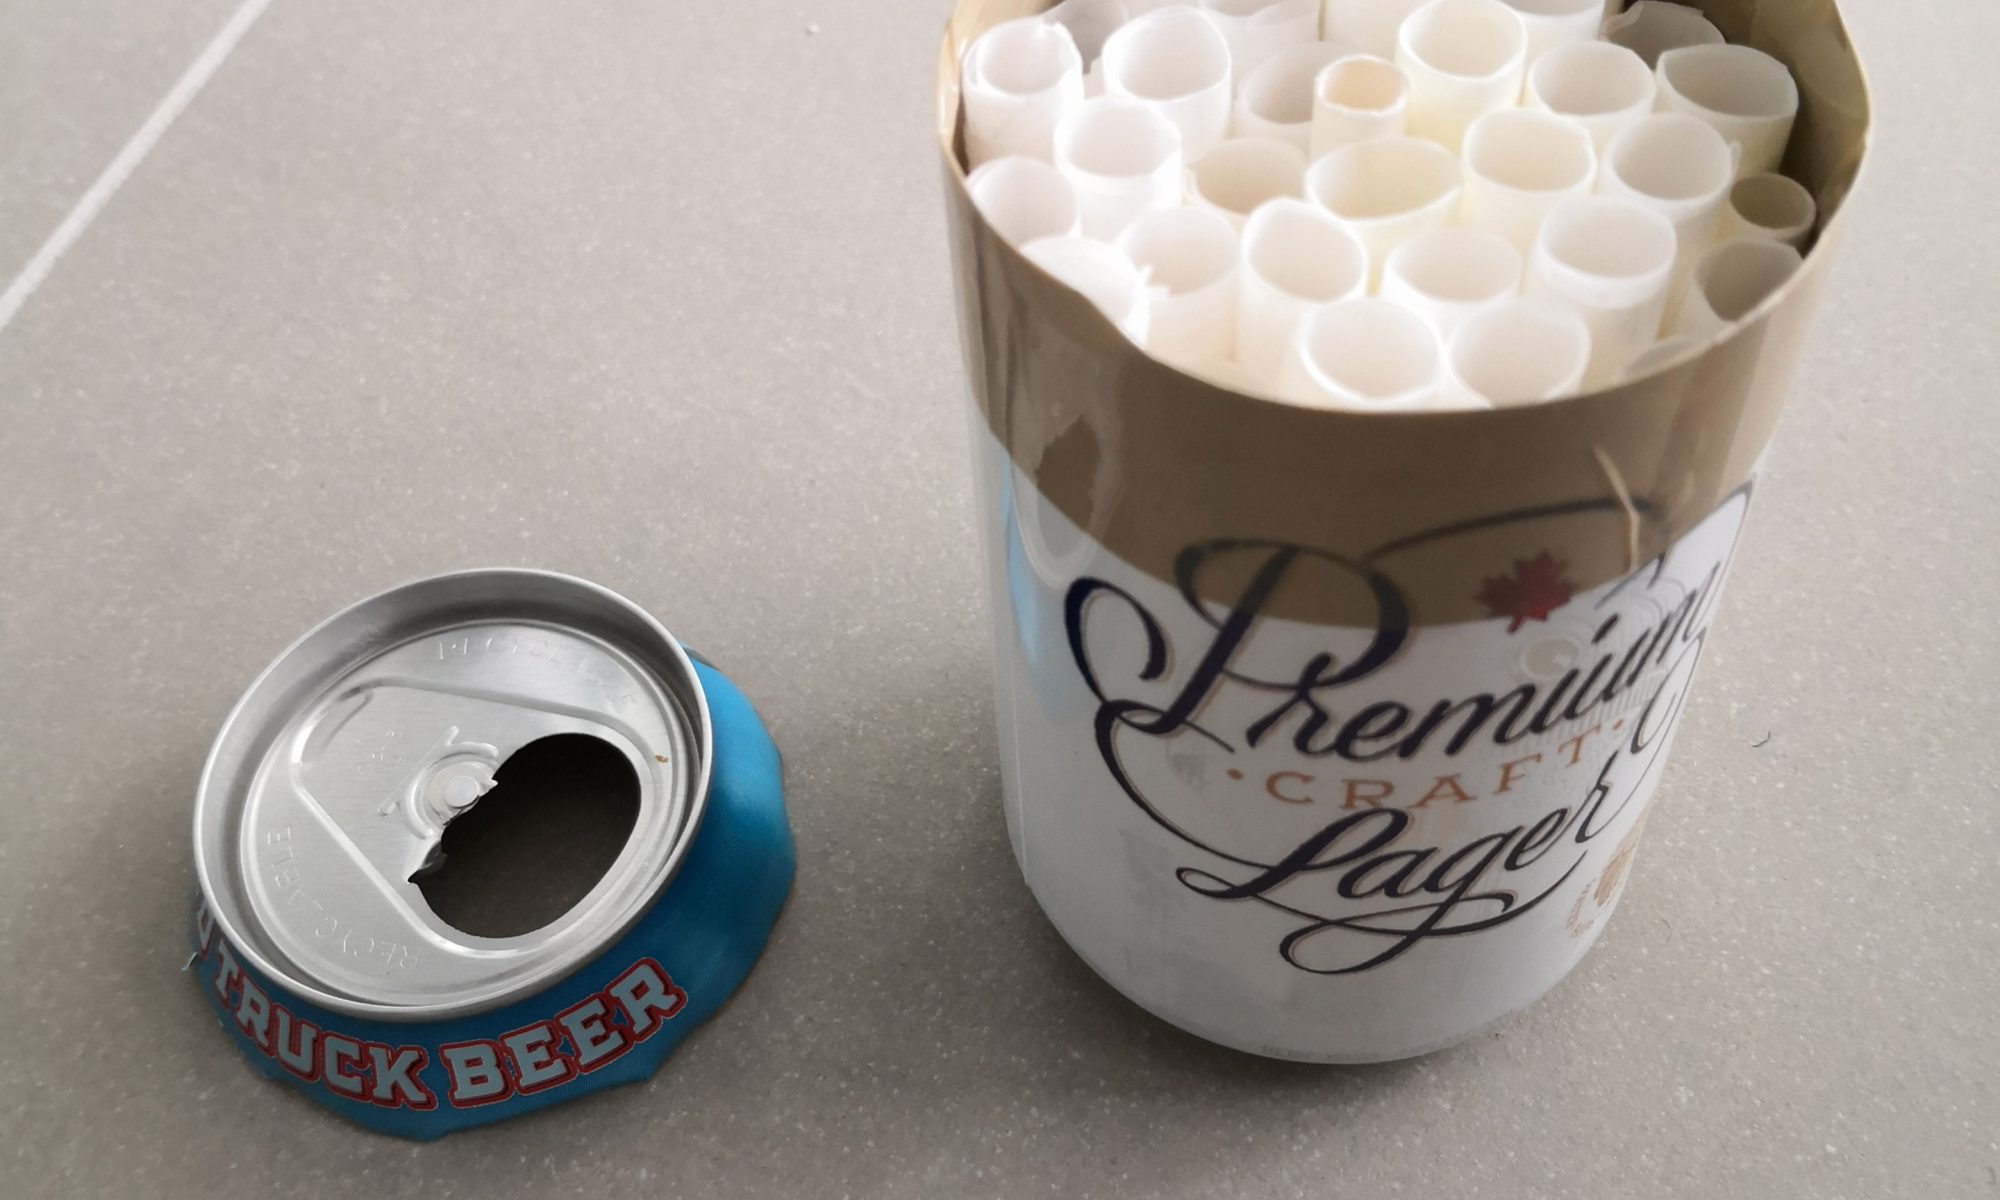
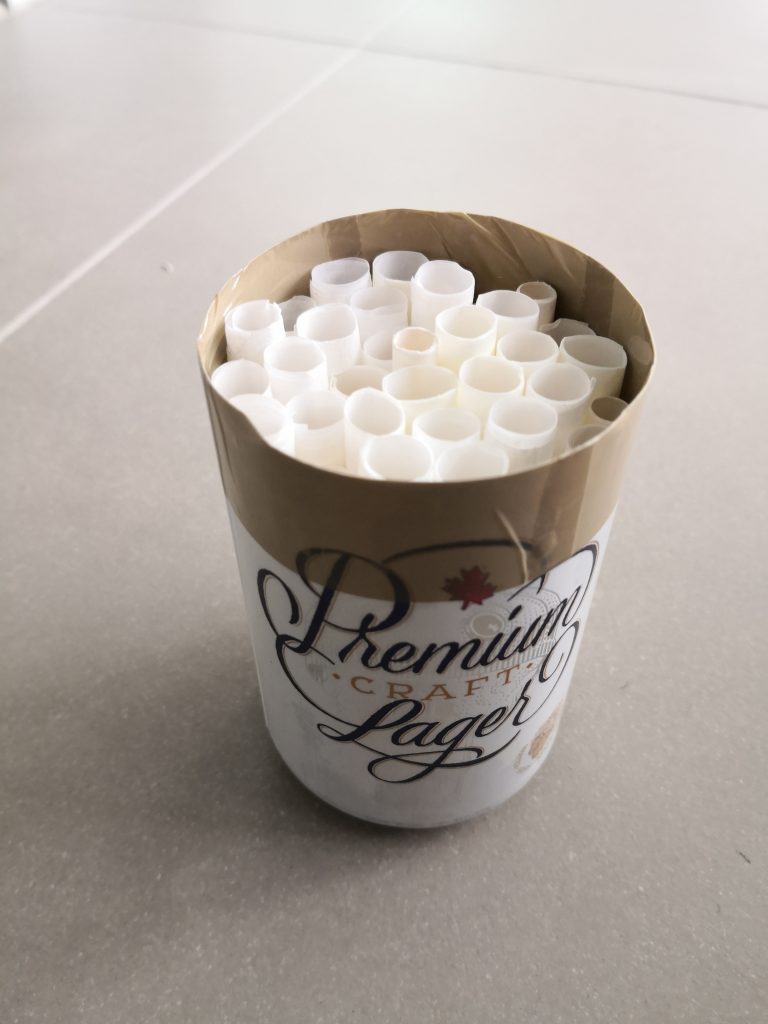
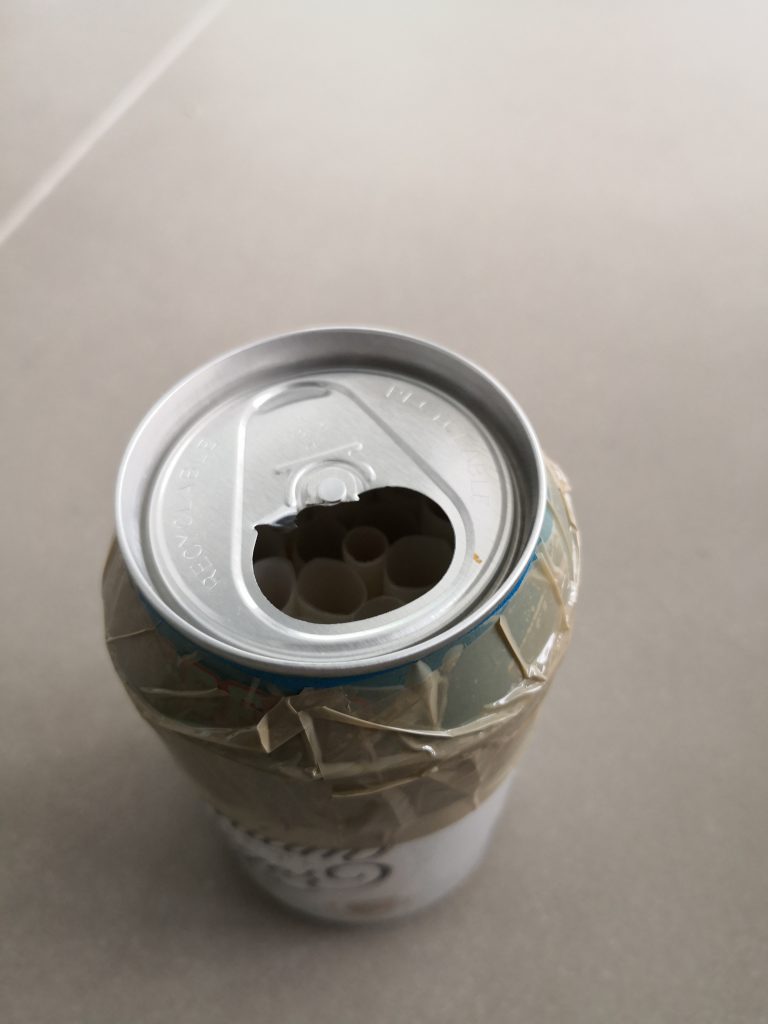
This post is about an experiment for this year. I went looking for chicken wire this afternoon to fashion a guard at the entrance of each house and was unable to find any at all. It seems toilet paper isn’t the only item sold-out in these days of coronavirus stockpiling, though I struggle to think what the chicken wire is for. When I got home I realized that several of my native bee homes use beer cans for the main housing, with the tops cut off. Given a beer can has a small (too small for most birds to pass through) hole, I thought maybe they could be reattached to the base once the various tubes were packed in, creating a bee home protected from both rain, birds and squirrels alike.
I give you, the Mason Bee(r) House TM
I’m sure there are some issues with this approach… like moisture entering as mist with no easy way to exit given the can walls aren’t permeable… or maybe excessive heating depending where it’s placed, and I’d love to hear them, but I’m definitely going to give these a shot.
I would sell plans laid out in exhaustive detail, but as you’ll see in the photo there was little in the way of planning, and the details are the furthest thing from exhaustive.
Enjoy 🙂
Step 1. Cut the can and insert your tubes.
Step 2. Smooth the edges, remove the tab and return the top to the full bee house.
Step 3. I taped the top back on the beer can base and voila!