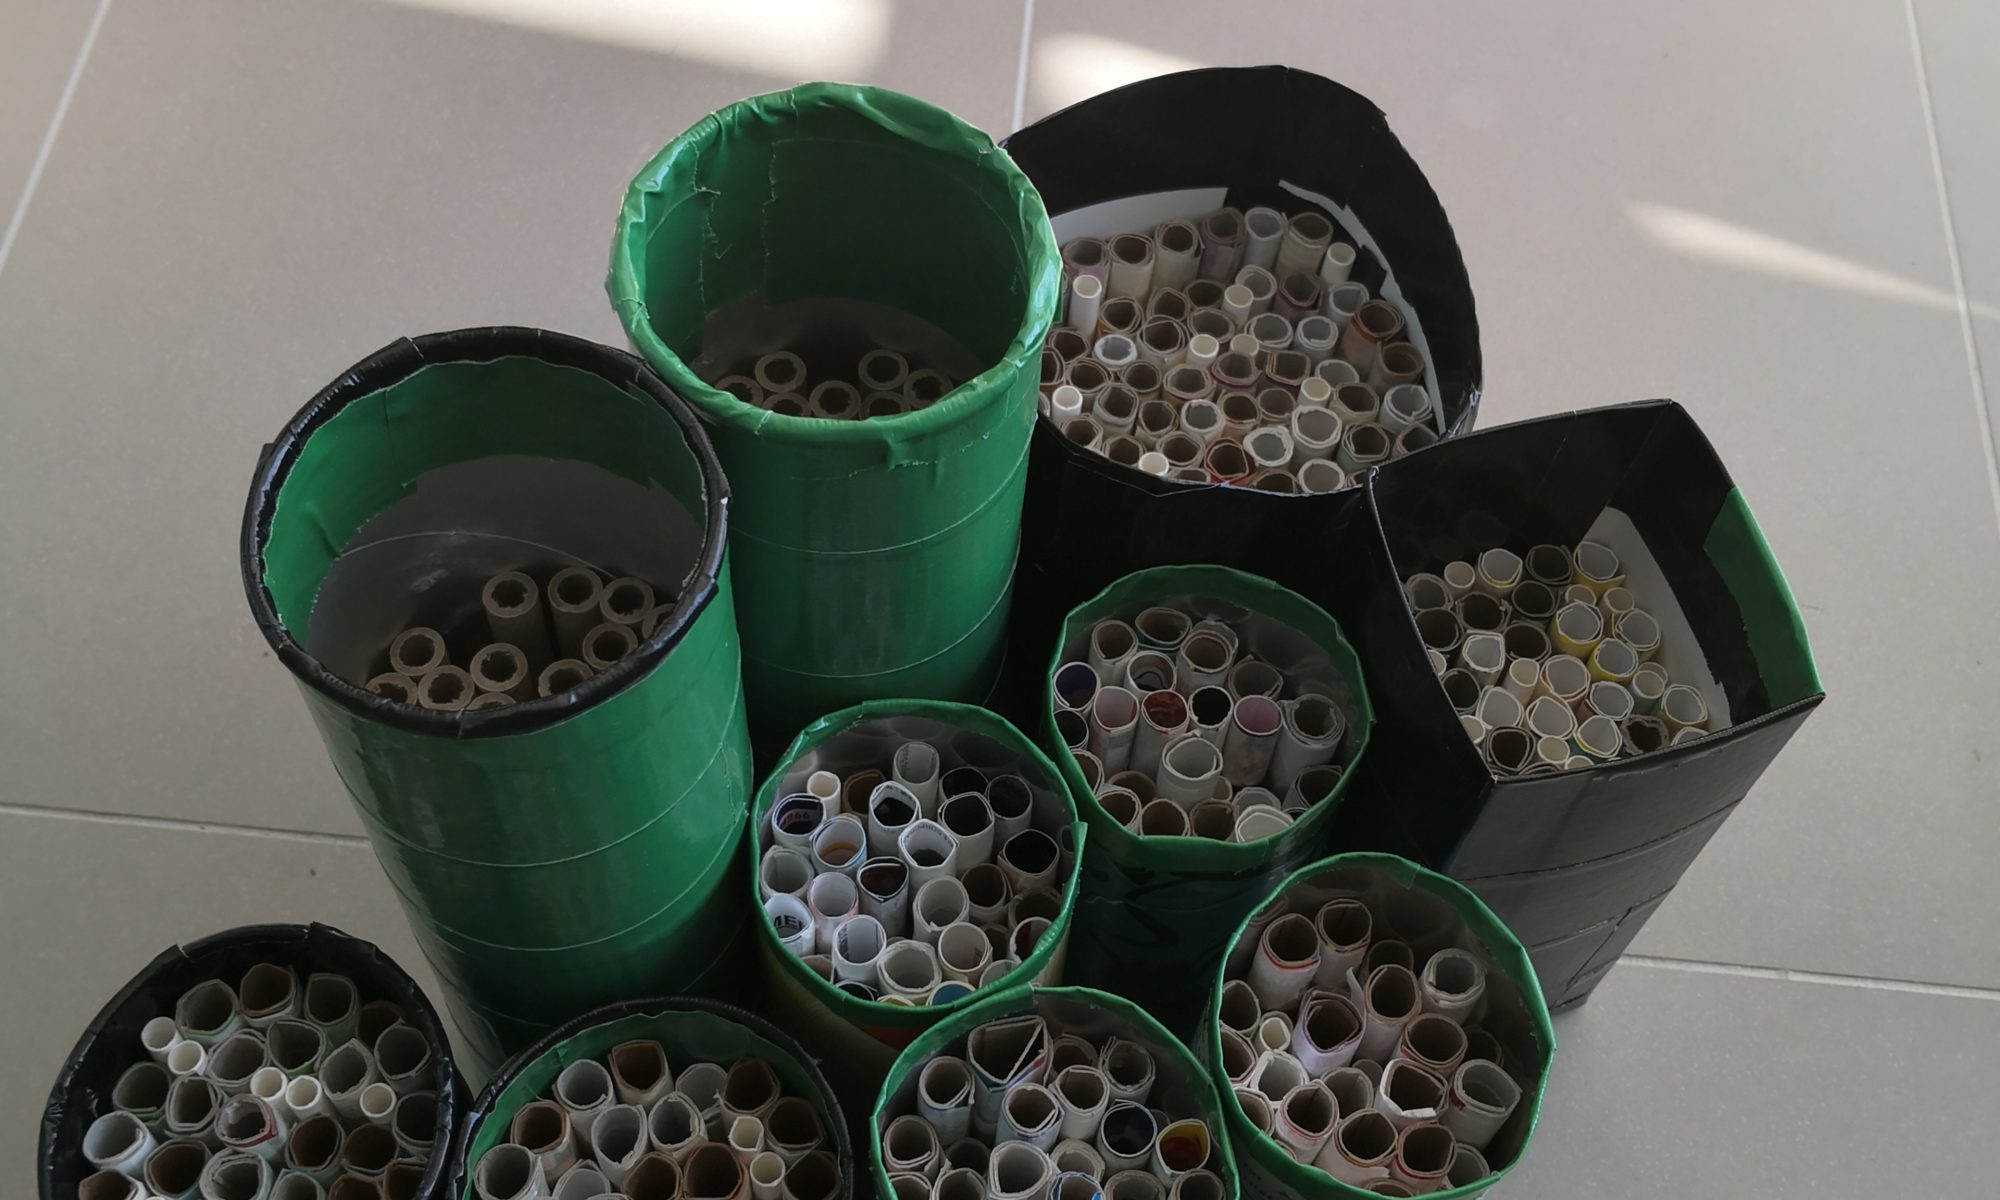
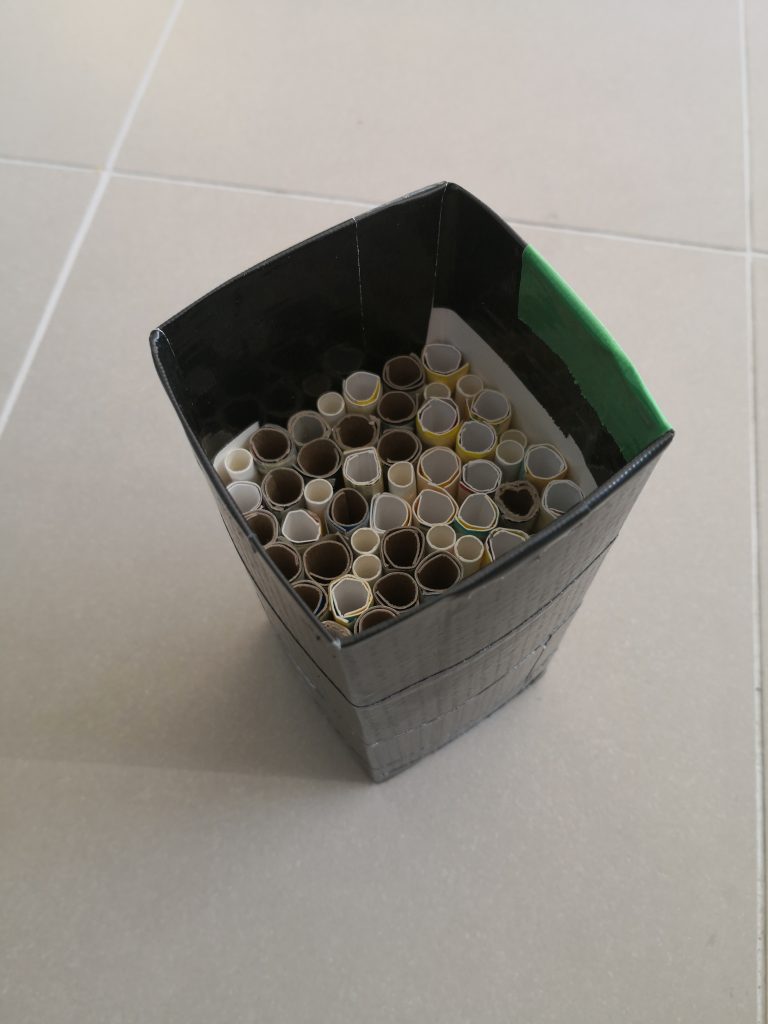
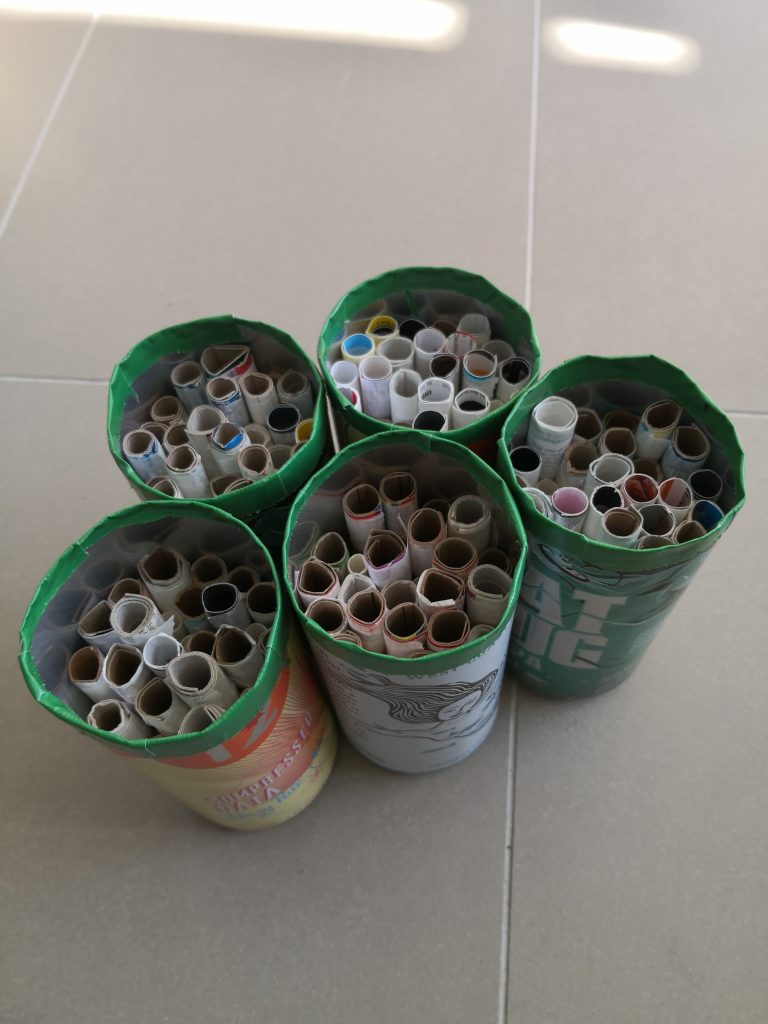
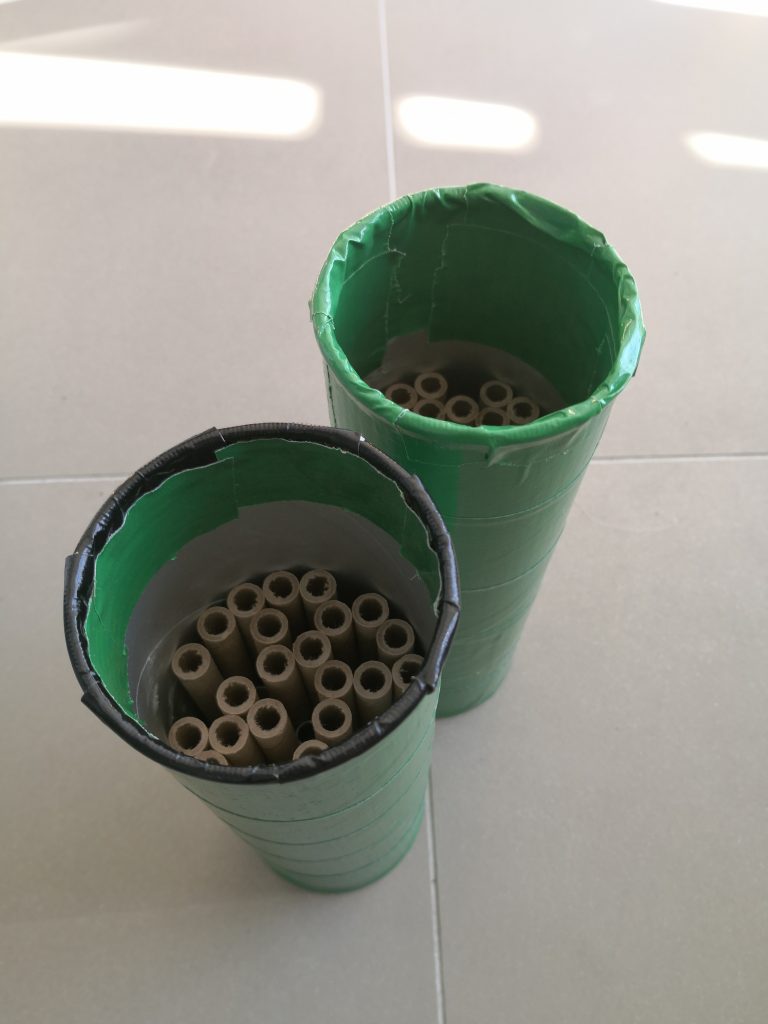
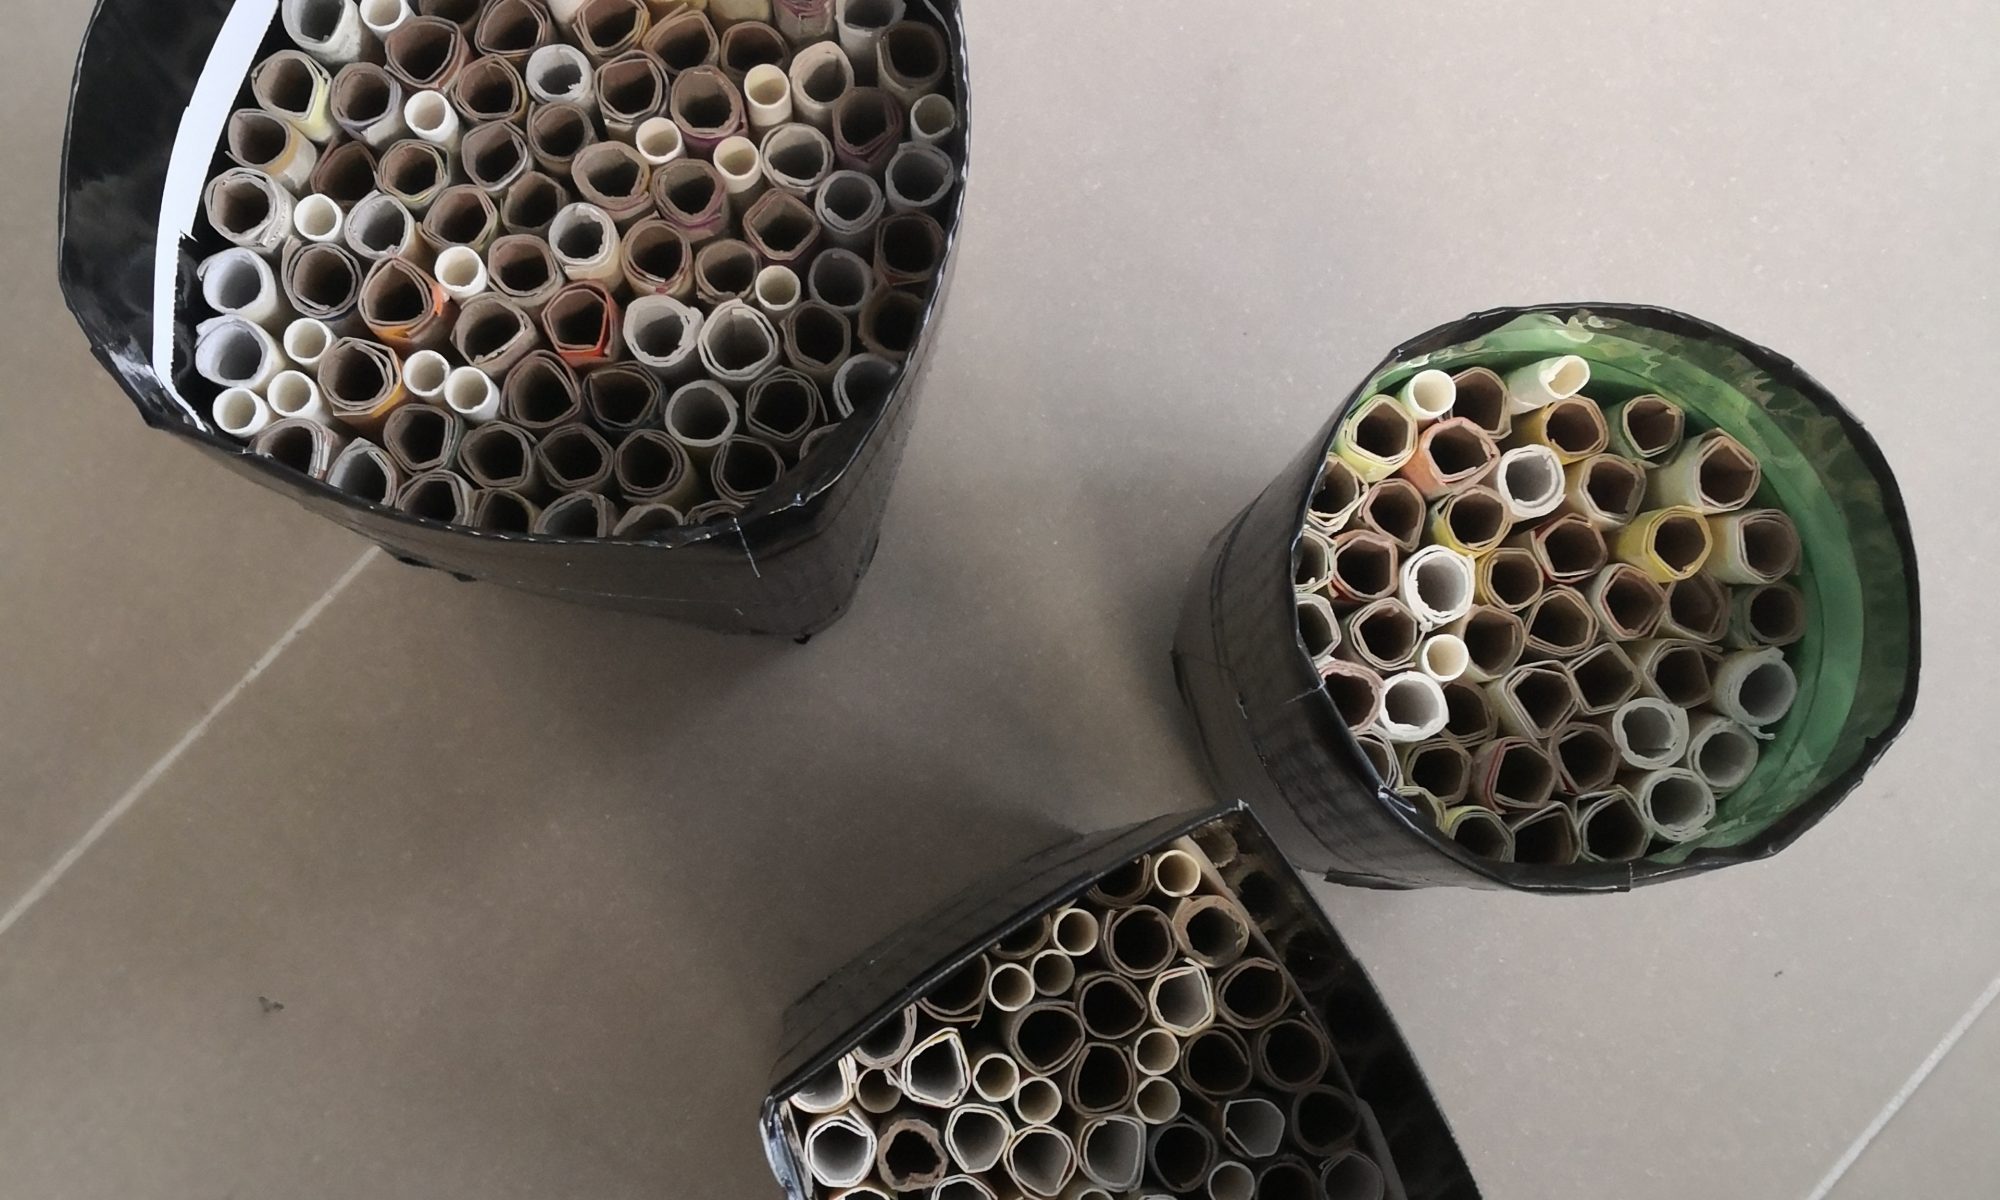
This one is a bit of a do it yourself mason bee house experiment. I’m going 100% DIY this year after seeing my store-bought houses disintegrate over the winter while last year’s milk carton-based creations look as good as new (and will only require a quick wipe-down with dilute bleach solution before I reuse them this year). Last week I posted a few examples of the house styles I was playing around with, and since then I’m up to 20 individual bee homes of various shapes and sizes.
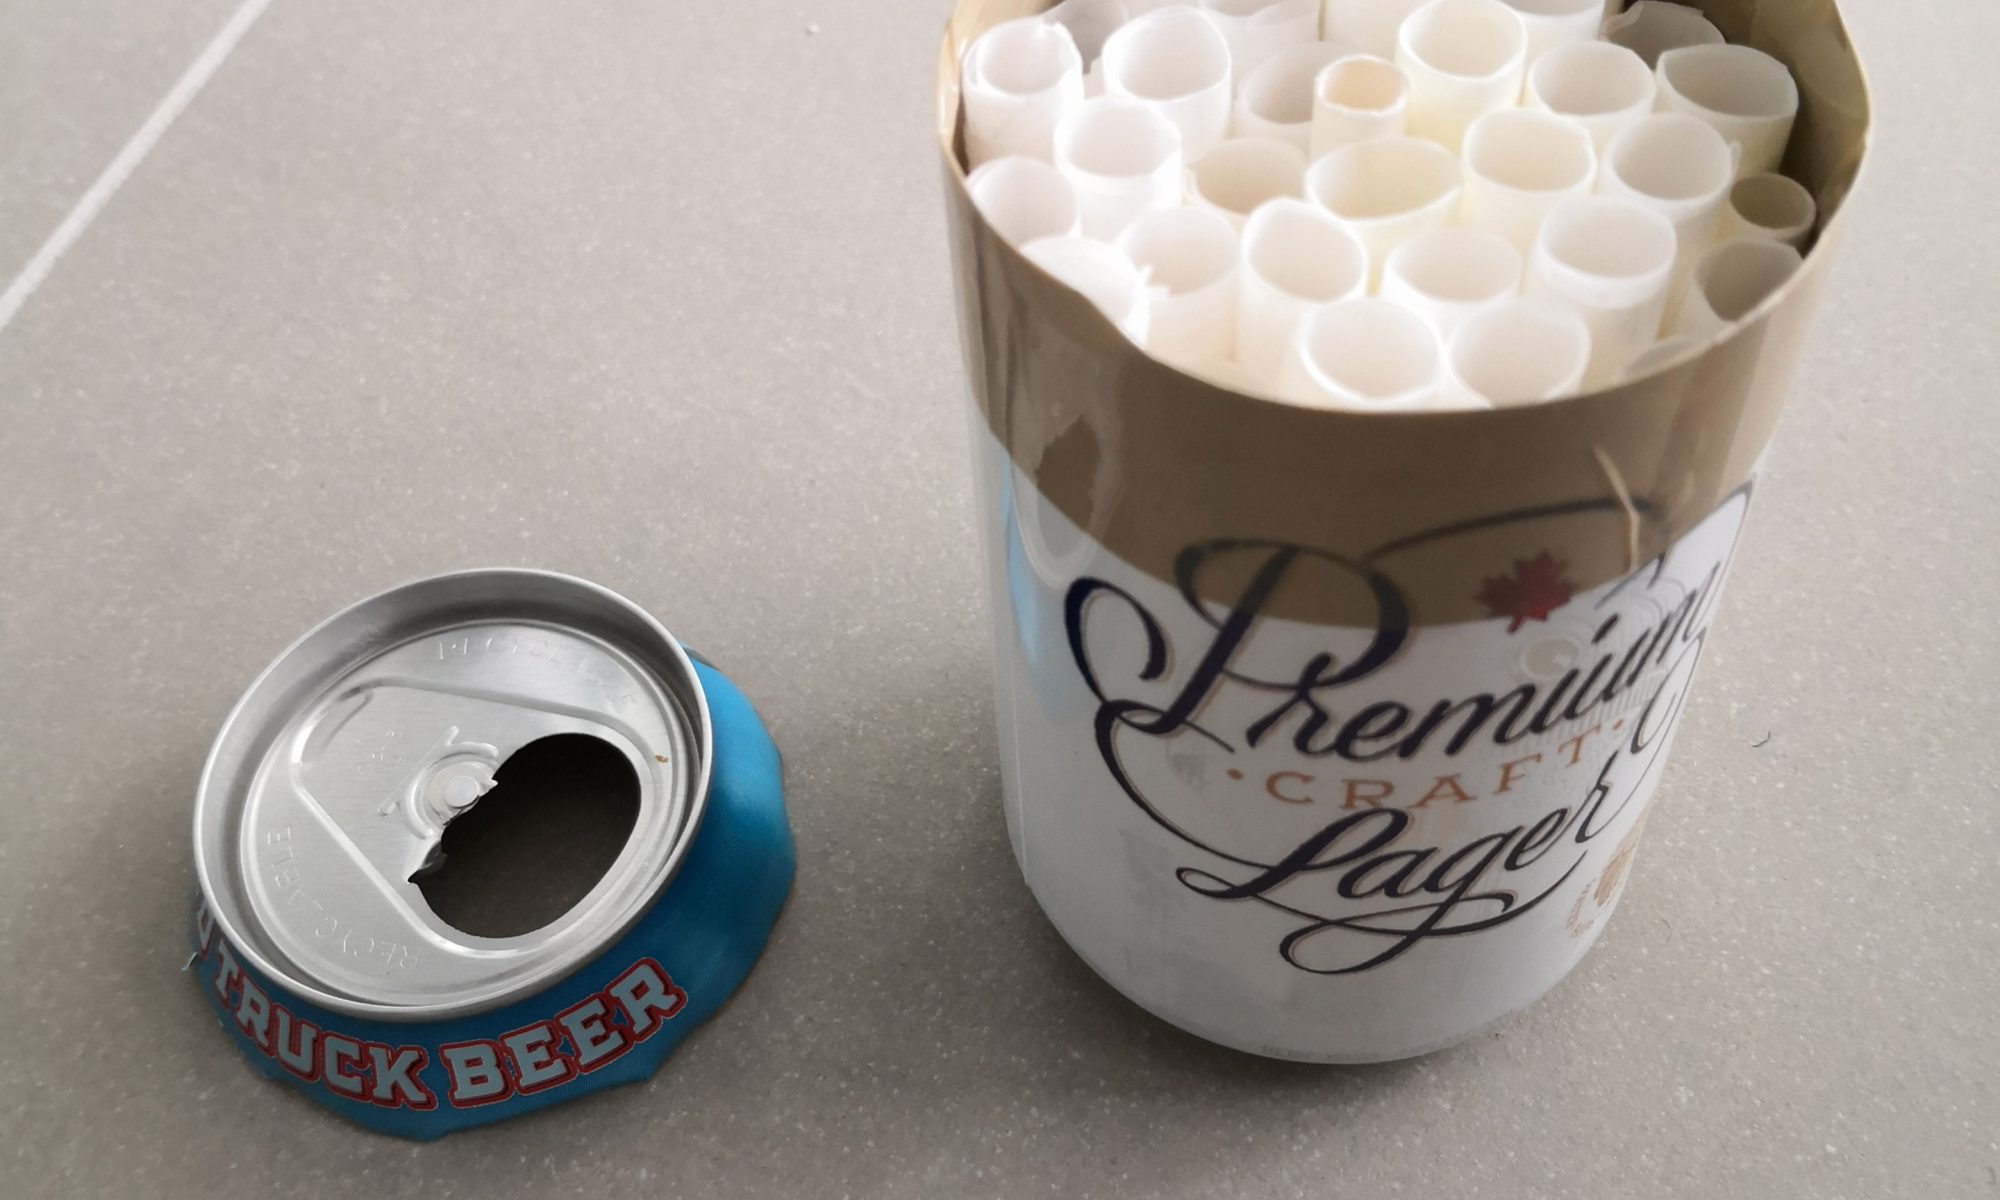
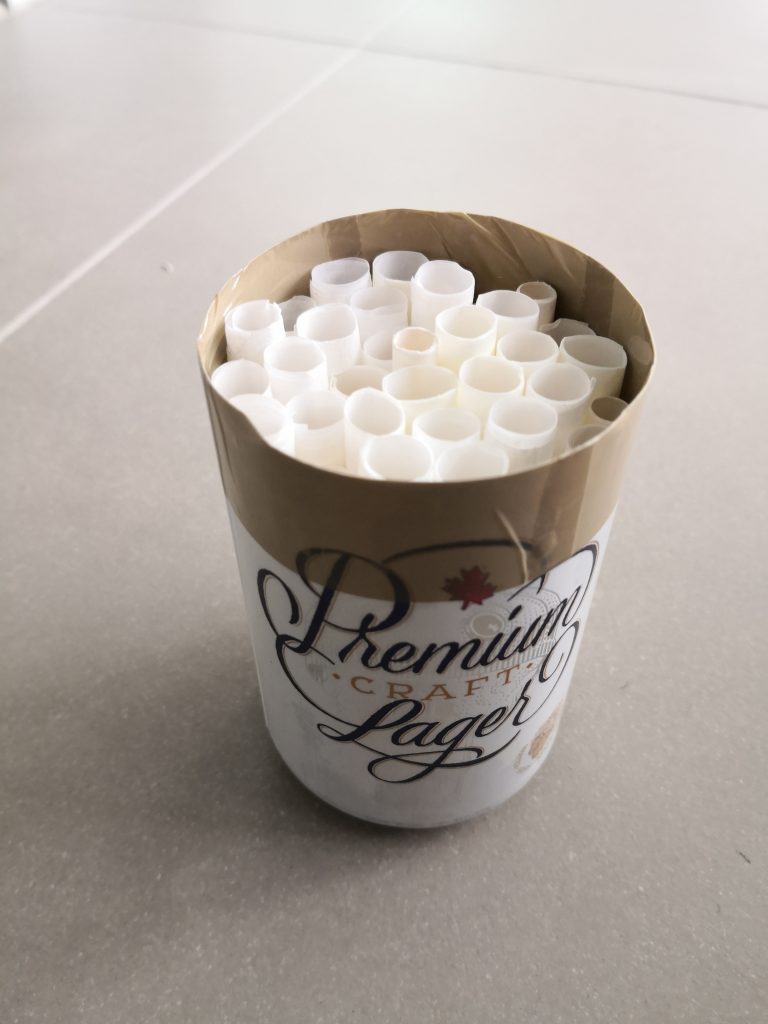
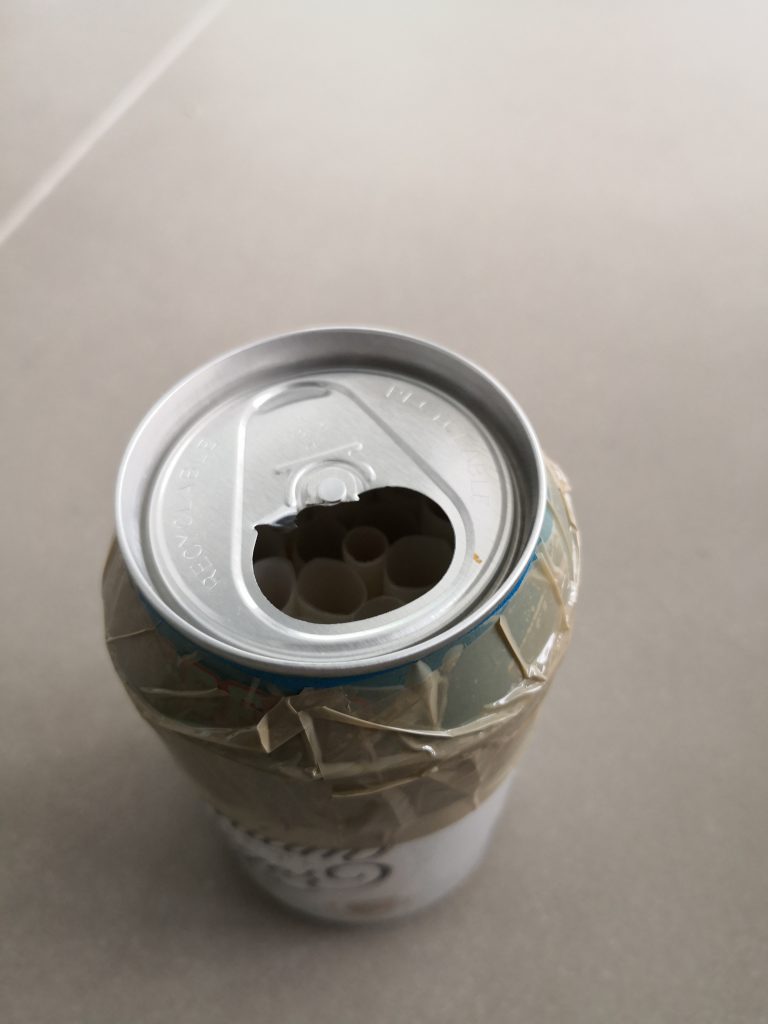
This post is about an experiment for this year. I went looking for chicken wire this afternoon to fashion a guard at the entrance of each house and was unable to find any at all. It seems toilet paper isn’t the only item sold-out in these days of coronavirus stockpiling, though I struggle to think what the chicken wire is for. When I got home I realized that several of my native bee homes use beer cans for the main housing, with the tops cut off. Given a beer can has a small (too small for most birds to pass through) hole, I thought maybe they could be reattached to the base once the various tubes were packed in, creating a bee home protected from both rain, birds and squirrels alike.
I give you, the Mason Bee(r) House TM
I’m sure there are some issues with this approach… like moisture entering as mist with no easy way to exit given the can walls aren’t permeable… or maybe excessive heating depending where it’s placed, and I’d love to hear them, but I’m definitely going to give these a shot.
I would sell plans laid out in exhaustive detail, but as you’ll see in the photo there was little in the way of planning, and the details are the furthest thing from exhaustive.
Enjoy 🙂
Step 1. Cut the can and insert your tubes.
Step 2. Smooth the edges, remove the tab and return the top to the full bee house.
Step 3. I taped the top back on the beer can base and voila!
Just a quick update on the super-hot seeds planted recently. Frankly I’m surprised at how many have already sprouted given past experience. All were planted in seeding mix, on a heat mat. There is a single grow light over the seedlings as they sprout (and they are sitting at a south-facing window).
The following outlines my attempts to create a few low budget mason and leafcutter bee houses to spread around the property. Houses I won’t be overly concerned about should weather or other factors damage them during the hear. They are NOT pretty, so if you’re looking for mason bee houses to improve the appearance of your garden consider one of the following (but remember to take them in over winter else you’ll be buying again next year.
My mason bee houses are in bad shape. Really bad shape. Being the fool that I am I forgot to bring them in and left them to the elements on the roof through a very wet, very cold winter. Rather than spend for new, nicely designed houses I’ve decided to get scrappy and go the DIY route.
What do I have so far? A whole lot of ugly, but ugly that just might work if placed in the right locations. I wanted something light, that wouldn’t break if dropped, and that required as little work as possible. I used cardboard from the recycle bin (toilet paper rolls, cereal and cracker boxes etc) to make the mason bee tubes, rolling the cardboard around a pencil and taping them once rolled using masking tape. Pay attention to which direction the cardboard ‘wants’ to roll and it will make your life much easier. Last year I used dollar store bamboo and did a pass with a cordless drill to open up any tubes that weren’t fully accessible. These worked, but opening the bamboo was a real challenge. I’m hoping the cardboard will be much easier to open in the fall in order to recover and clean the cocoons.
Also, I’m considering placing some kind of mesh at the entrance to prevent larger animals (birds, squirrels etc) from ruining things, and giving the bees some measure of protection while they work.
The three ‘designs’ I’ve tried so far start with the milk carton mason bee house:
Milk carton. 1L size, to cut off.
Duct tape
Cardboard for rolling (toilet paper tubes, cereal boxes, etc)
Paper straws
Masking tape
I used the duct tape to ‘waterproof’ the paper milk carton, including about 2 inches inside the lip of the carton to both protect the exposed cardboard from the initial cut, and to provide some texture for the tubes to catch against. I used a blend of tubes (different cardboard sources and slightly different lengths) an also included a few smaller, paper straw tubes in case other bee types show up. All tubes were pushed against the back of the carton, and I kept adding until I could add no more.
Milk carton mason bee house version 1
Next up is the beer can mason bee house.
Beer cans (473mL tall style)
Duct tape
Cardboard for rolling
Paper straws
Masking tape
Basically the same as the milk carton, expect I had to cut the tops off the beer cans. I just used a serrated knife, but use whatever you like, and be careful. Once off, cleaned and dried I used duct tape around the cut edge to smooth them. From there it was the same as with the cartons.
Beer can mason bee house
Finally, Pringles can mason bee house.
Tall Pringles can
Duct tape
Cardboard for rolling OR longer cardboard pre-fab tubes
Paper straws
Masking tape
Pringles can was similar to the milk carton, but is my least favorite as despite washing the inside, the sides remained slippery. The tape isn’t sticking as well as the others, so we’ll see how these ones perform.
Pringles can mason bee house
Over the next several days I’ll be placing these mason bee houses around the property here, as well as a few other locations I saw frequented by mason bees last year. As always, I’ll be positioning the bee houses facing southeast, and to the extent possible under cover to limit the risk of water ingress.
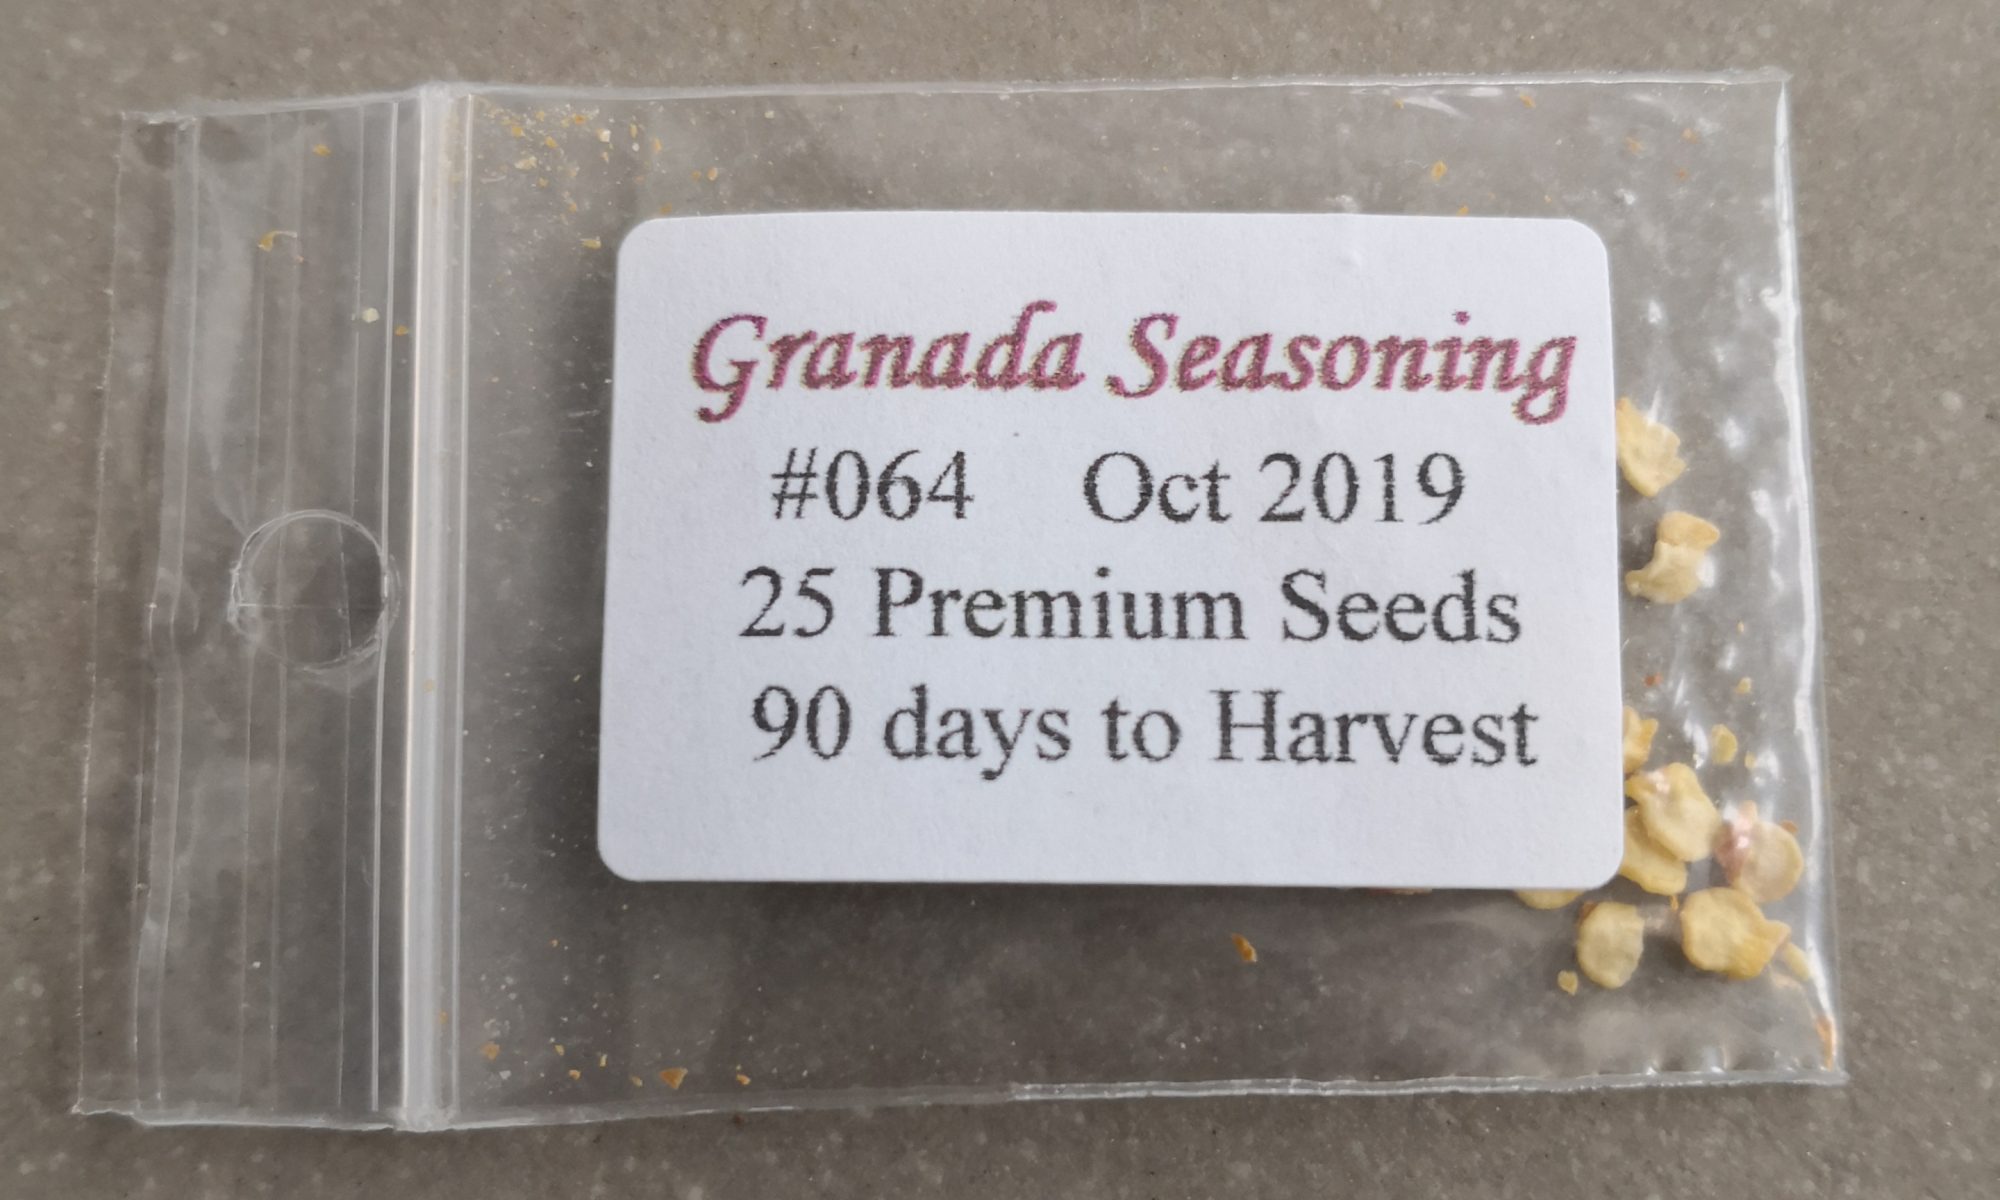
This might be a new one for many of you, but Seasoning Peppers (Tobago Seasoning Peppers, Granada Seasoning Peppers, Trinidad Pimento Peppers and other names) are peppers that look and smell very similar to Habanero Peppers and some of the super hots, sharing some taste, but don’t have the heat.
I’ve never tried growing these before, but I’ve used them in cooking anytime I can find them in Caribbean specialty shops (which isn’t often). I’ve been coming across more and more recipes calling for Trinidad Pimento peppers, so I figured it was time to give them a try. I found some seeds on eBay and planted them earlier today, so I’m keeping my fingers crossed that a) they germinate and grow and b) they’re actually Seasoning Peppers (I’ve had some surprises when purchasing pepper seeds on eBay). Stay tuned.
To hold you over, here are a couple videos I found on Youtube that discuss these unusual peppers.
2019 was my first year growing fennel. I grew both from starts (Orion I believe with the rounded bulb ), as well as from seed (Selma Fino from WestCoastSeeds). Initially I planted them out of curiosity as I do enjoy fennel in salads, and like the look of both fennel and dill plants. After year one, I recommend a fennel planting to anyone considering it, and will be planting several pockets of fennel again this year.
First, my fennel did very well, both those started from small pants and those started from seed. After a bit of a slow start, the seed fennel took off and by year’s end were massive.
Next, they were a very effective draw for pollinators and various types of wasps. Based on what I’ve read, I believe several of these were predatory wasps, which I was very happy to have around. The fennel flowers bloomed on immense heads and at any given point were covered by bees, wasps as well as ladybugs which really seemed to favor the plant.
Recommendations?
If you’re planning to eat them, plant extras (so you can have the benefits of the ladybugs and wasps throughout the season) and don’t wait too long to harvest. If I could do it over, I would have pulled the bulbs earlier as the ones we ate were a bit woody. According to WestCoastSeeds you should harvest the fennel bulbs before the flowers form… in which case I wasn’t even close.
Think about how you might stake them. I planted my fennel fairly close to some of my pepper plants (to the north and east so as not to shade them) and later in the summer the fennel started to bend over top the peppers. I tied the longer stalks back, but it wasn’t very nice to look at. This year I’ll better plan how to keep the fennel stalks and flowers from shading the peppers, while still having them close enough for the wasps and ladybugs to wander by.
Don’t forget the seeds! At the end of the summer I saved a fair number of fennel seeds from one of the plants. After they’d try they served as a very nice snack over the next several months. That said, don’t leave the little ‘connector’ to the seed itself. Those things don’t fall off easily on their own, and dry into little gum-piercing spears. You’ve been warned.
Don’t plant too close to dill. I read this somewhere, but given that they’re closely related you want to keep them away from one another.
That’s it. I didn’t experience any real downsides to growing fennel in my garden, and observed several valuable benefits that will see fennel become a constant presence in my garden going forward.
One more thing. I didn’t fully clean out my fennel at the end of last year. On inspection this week I noticed that shoots were erupting from the older bulb / roots. I pulled the old plant and cut the base into several pieces, each with a new green shoot and placed them back in the garden bed. It’s been several days, and so far they’re showing no ill effects, so I may have found an easy way to get a head start on this year’s fennel patch.
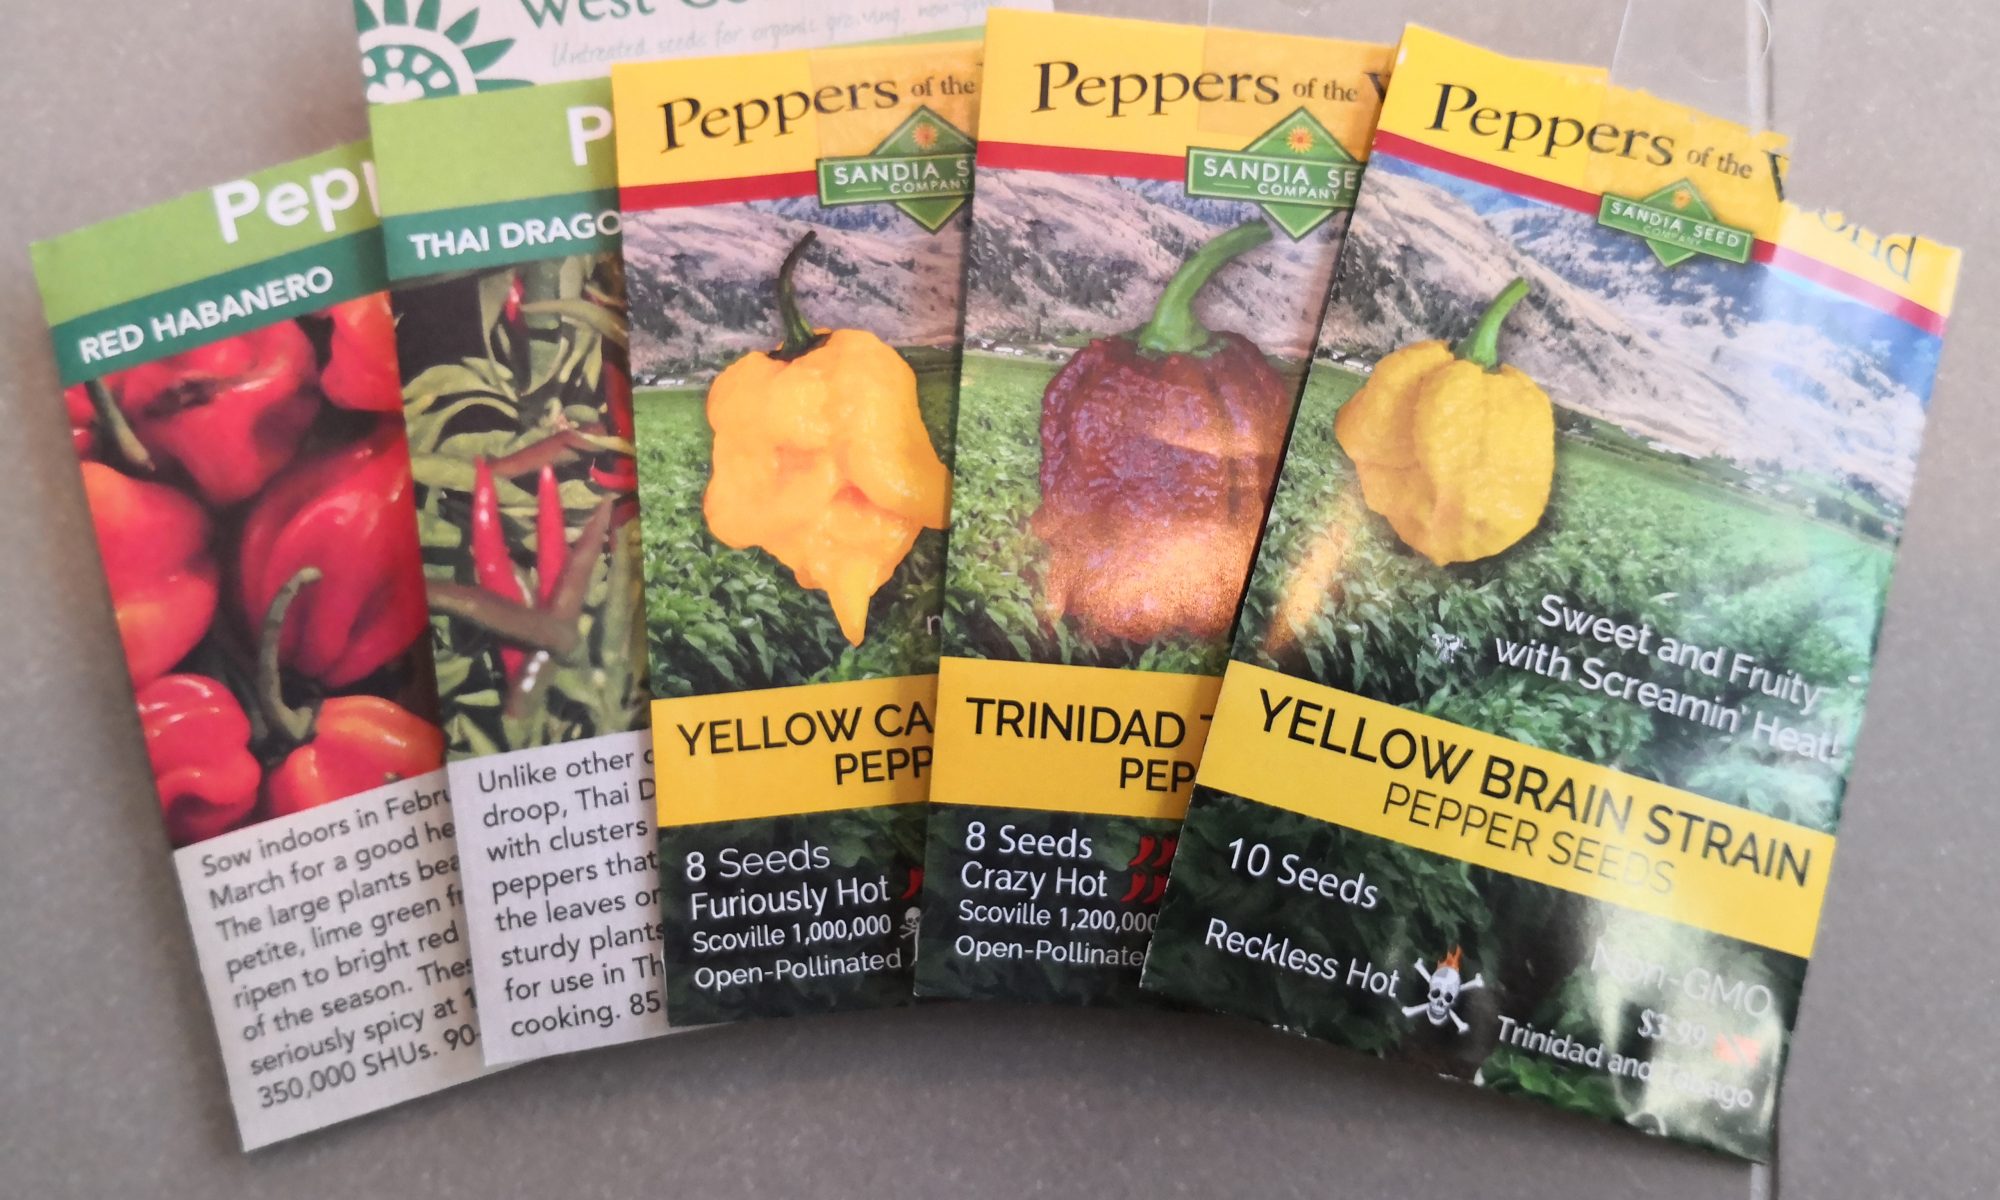
I realize I’m a bit late to the game and should have planted seeds in December…. but I’ll remain hopeful and give it a go anyway. Peppers are being started in Jiffy trays (Buy from US / Canada) on heat mats (Buy from US / Canada), under full spectrum lights (though admittedly not an ideal lighting setup in this case, but the best I already had on-hand. Seeds in the “ground” at this point include:
Yellow Brain Strain
Red 7 Pot Brain Strain
Yellow Carolina Reaper
Trinidad 7 Pot Douglah (chocolate)
Moruga Trinidad Scorpion
Naga Viper
Thai Dragons
Red Habaneros
Of the above group I’ve previously had success with the Thai Dragons, Red Habaneros Moruga Scorpions and Carolina Reapers, but the others are new to me and we’ll just have to see how things go.
I’m convinced that without full spectrum lights I would have no chance of growing super hot peppers quickly enough to get a harvest in the Pacific Northwest. Similarly, I’m convinced that without heat mats I would have not chance of germinating super hot peppers reliably and early enough to get a harvest. If you’ve tried one but not the other, make sure you try them together, and start early .
In addition to the heat mat and lighting setup, I’m planning to add a fan after they’ve germinated to try and strengthen the young plants early. I’ve had a tough time in the past hardening pepper plants for the transition outside. I’m not sure if this is a common issue, a reflection of having started them late and trying to transition when too young, or just a fact of life given Vancouver’s somewhat unpredictable weather.
This article is a work in progress. Here in Vancouver we’re under siege by various grubs in lawns across the city. You can see yards and playing fields with tufts of sod everywhere, overturned by hungry crows looking for an easy dinner of fat grubs. Fortunately I have yet to find these big beetle grubs in the garden. Unfortunately I have regularly found smaller white grubs throughout the growing season.
Last year I decided to try one of the grub spray solutions early in the season to see what would happen. I can’t say for certain, but I do think it worked. I didn’t spray all of the planted beds, but those I did spray didn’t surface grubs through the season when I overturned the soil. Those I didn’t spray exposed those tiny white grubs when I dug around in the soil.
Application was simple. You buy a container that holds something similar to a teabag full of powder (the beneficial nematodes that will eventually kill the grubs in the soil) as well as an applicator which attaches to your hose and (one hopes) evenly distributes the solution as you spray. This stuff isn’t cheap mind you, but in light of the results I’ll be doing it again this year.
Just like that we’re (hopefully) through the worst of winter here in the Pacific Northwest. We’re into March in a month, which means it’s time to ready your bee homes, and the residents they’ll house.
While there aren’t any blooms out at this point, other than a handful of crocus’ providing a splash of colour, the various berry bushes have produced buds, with the gooseberries showing the first hint of leaves. It won’t be long now, and previous years have taught me that without the mason bees, we’ll be lucky to get fruit from the gooseberries, blueberries and currants.
My chief learnings from the last year would be the following, along with mitigation ideas for this time around.
Angle the bee houses slightly forward. Last year, despite facing the tube openings eastward there were a few days with heavy wind and rain that saw moisture enter the bee home. This year I’ll be tethering the homes more securely to their anchors to prevent even the slightest shifting in wind, and I’ll be angling them slightly forward so that any liquid that enters has a natural path out.
Reconsider wooden bee houses. My wooden houses are in rough shape after only two seasons. This year I’m thinking of trying to repurpose something like plastic milk jugs or 2L soda bottles to form the shell of the bee home. Benefits I’m hoping for are that it allows reuse of an existing material, is impermeable to water, can be cut to the necessary dimensions including an overhang to limit water ingress, and won’t break down under the stresses of Vancouver weather. The test will be securing the bee tubes side the slick plastic shell.
Finally, if you’re looking for a source of good quality, well-priced mason bee tubes here are the ones I’m testing this year. I’ll be comparing them to the drilled bamboo tubes I used last year.
This past summer I tried tested black landscape fabric as a weed barrier, and heat retention tool for my pepper plants. The idea being that a) any weeds that germinated in that planter would be starved for light unless they could find a path to one of the holes where the peppers were planted, and b) the black colour of the fabric would serve to capture the sun’s heat, bringing the soil up to a temperature preferred by peppers even on cooler days.
What did I learn?
Weed suppression. Well, a single layer of landscape fabric doesn’t seem to starve weeds of light or water. Weeds still germinated and grew under the fabric. In some cases they surfaced through one of the pepper holes, but in many cases they didn’t, yet still appeared to grow well. Despite this, they were restricted to the height they were able to push the fabric, and so didn’t compete with the peppers vertically for sun. Not what I’d expected, but less work than the constant weeding needed with bare soil.
Heat capture. Landscape fabric does seem to trap the sun’s heat in the soil. Comparing the temperature of the soil under the fabric to the surface soil of a neighbouring bed showed clearly that this worked.
Surprise! There was another learning from this ‘experiment.’ When the pepper plants were the only plants accessible in this particular bed, they were the only plants that avian pests targeted. Crows are smart, and they watch every year as I prepare the soil and plant seedlings. It seems that the black tarp may have brought an appealing focus to the seedlings planted, and almost half of them were uprooted by curious crows over the course of several weeks. Eventually they seem to realize that pepper seedlings represented nothing of interest , but in the meantime halved the number of plants for the 2019 crop.
So, would I do it again? No. At least not the same way. I think next year I may encircle my seedlings with some of the fabric in service of heat capture, but I’m not going to blanket the entire bed. Additionally, I may consider covering the bed with netting or something similar until the plants are off to a good start to prevent the crow disaster from this past year.
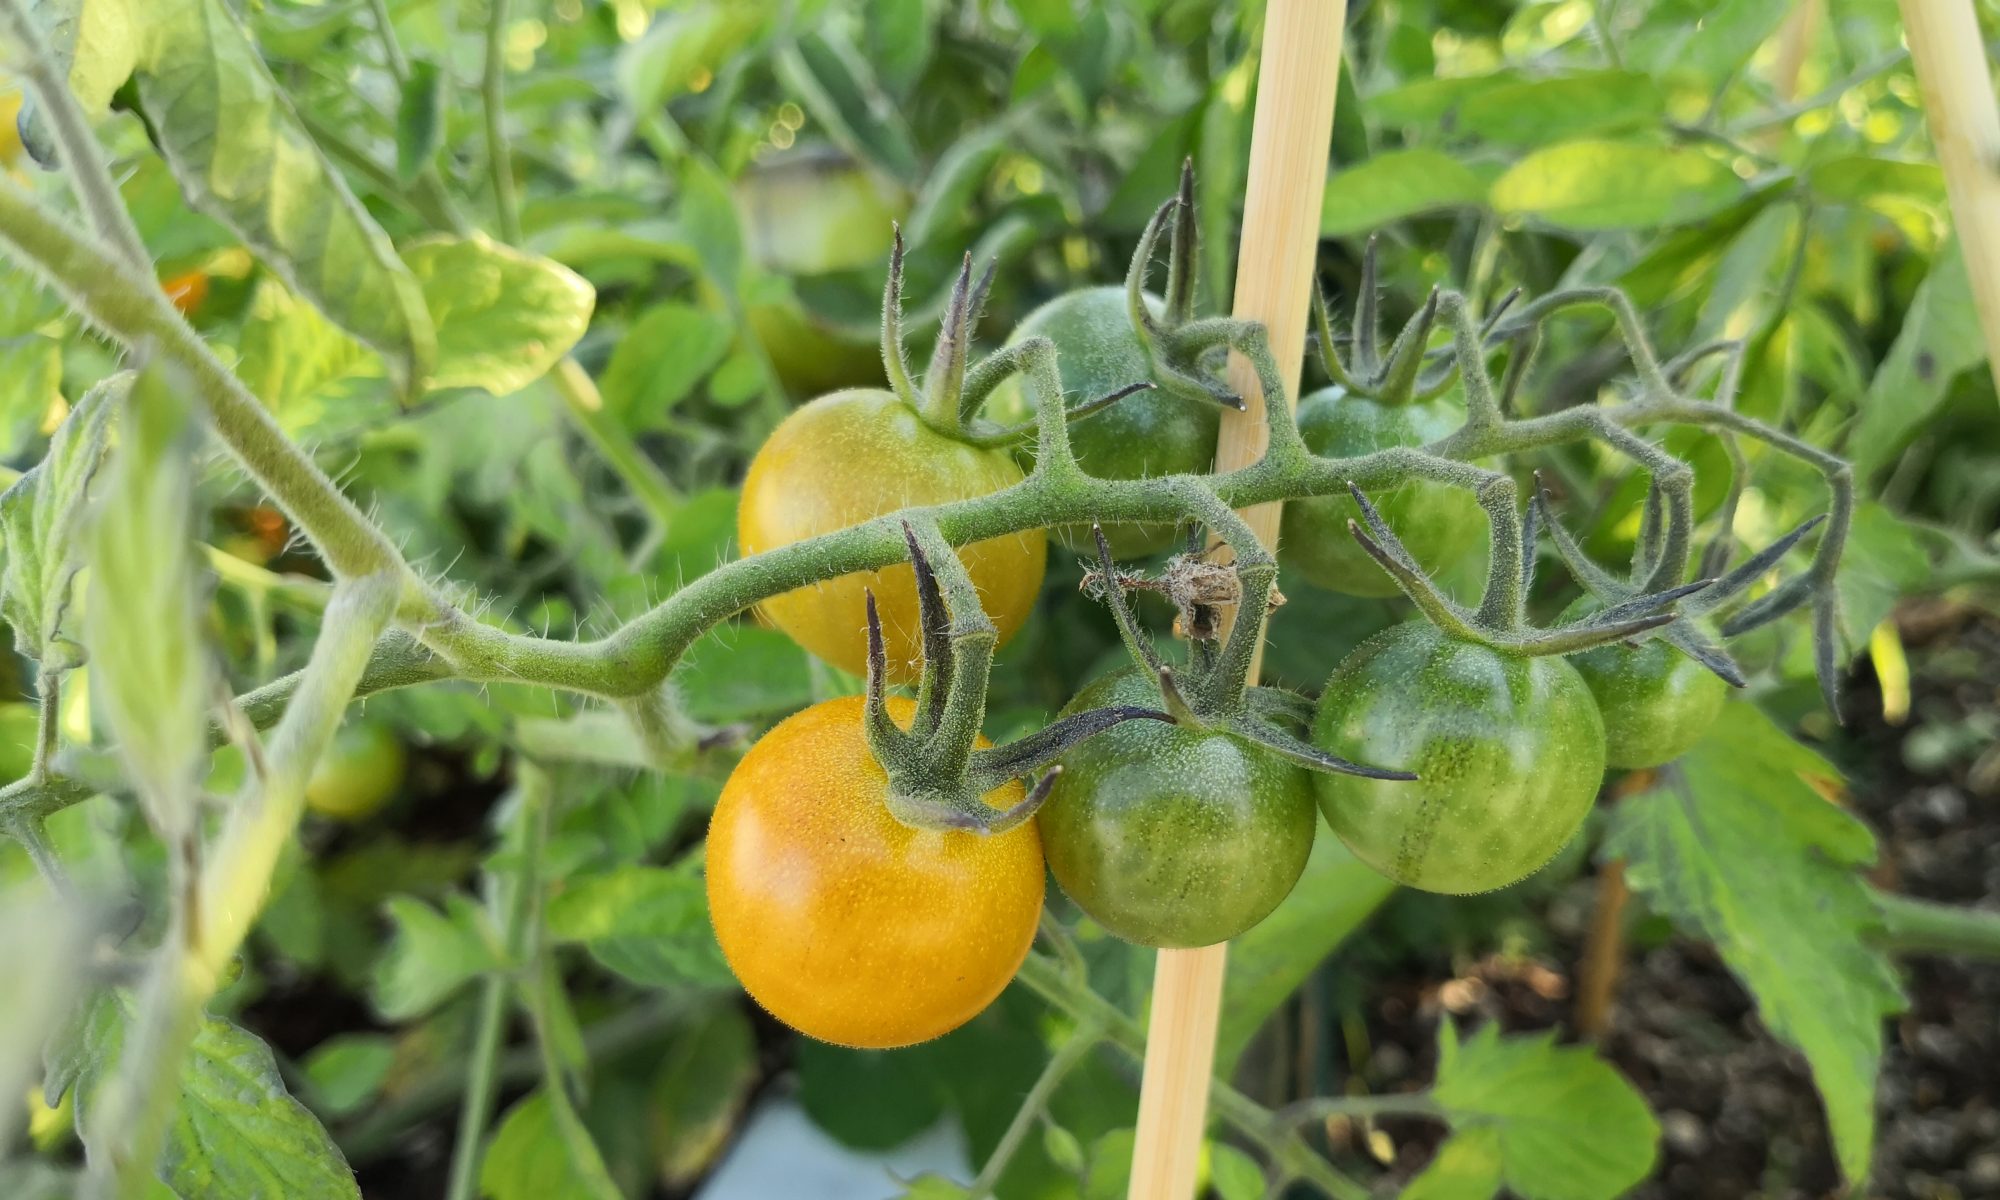
Winds on the roof can be more damaging than I’d anticipated. My focus has been on securing / protecting the ‘softer’ plants like peas, beans and tomatoes that may be whipped and damaged by the wind. Especially early in the season while stems are particularly flexible and soft. What I didn’t worry myself with were the berry plants.
In our rooftop garden we have 2 gooseberry bushes, 2 blueberry bushes and 3 currant bushes. All have been in the ground for at least 2 years, so there are relatively mature, woody stalks in all cases. That said, over a recent weekend we had winds strong enough to both strip flowers/fruit in some cases and even kill branches by presumably thrashing them about. In all cases the branch damage was on new, green growth but it did take me by surprise.
Lesson learned. Any new growth or soft material is at risk on the rooftop if not properly protected. This may take the form of staking, trellises (to allow peas to anchor for example, and limit thrashing), cages (to limit movement for larger tomato and tomatillo plants for example), barriers (I’ve used burlap stretched across stakes to create windbreaks) or natural barriers like hedges. I don’t know that the form is important is terribly important provided that it gives the necessary support or protection. The one exception being that in past experience fully blocking wind can expose plants to mildew and other issues as circulation is limited.